Written by: Allard Lavaritte
Date Updated: July 15, 2025
TL;DR:
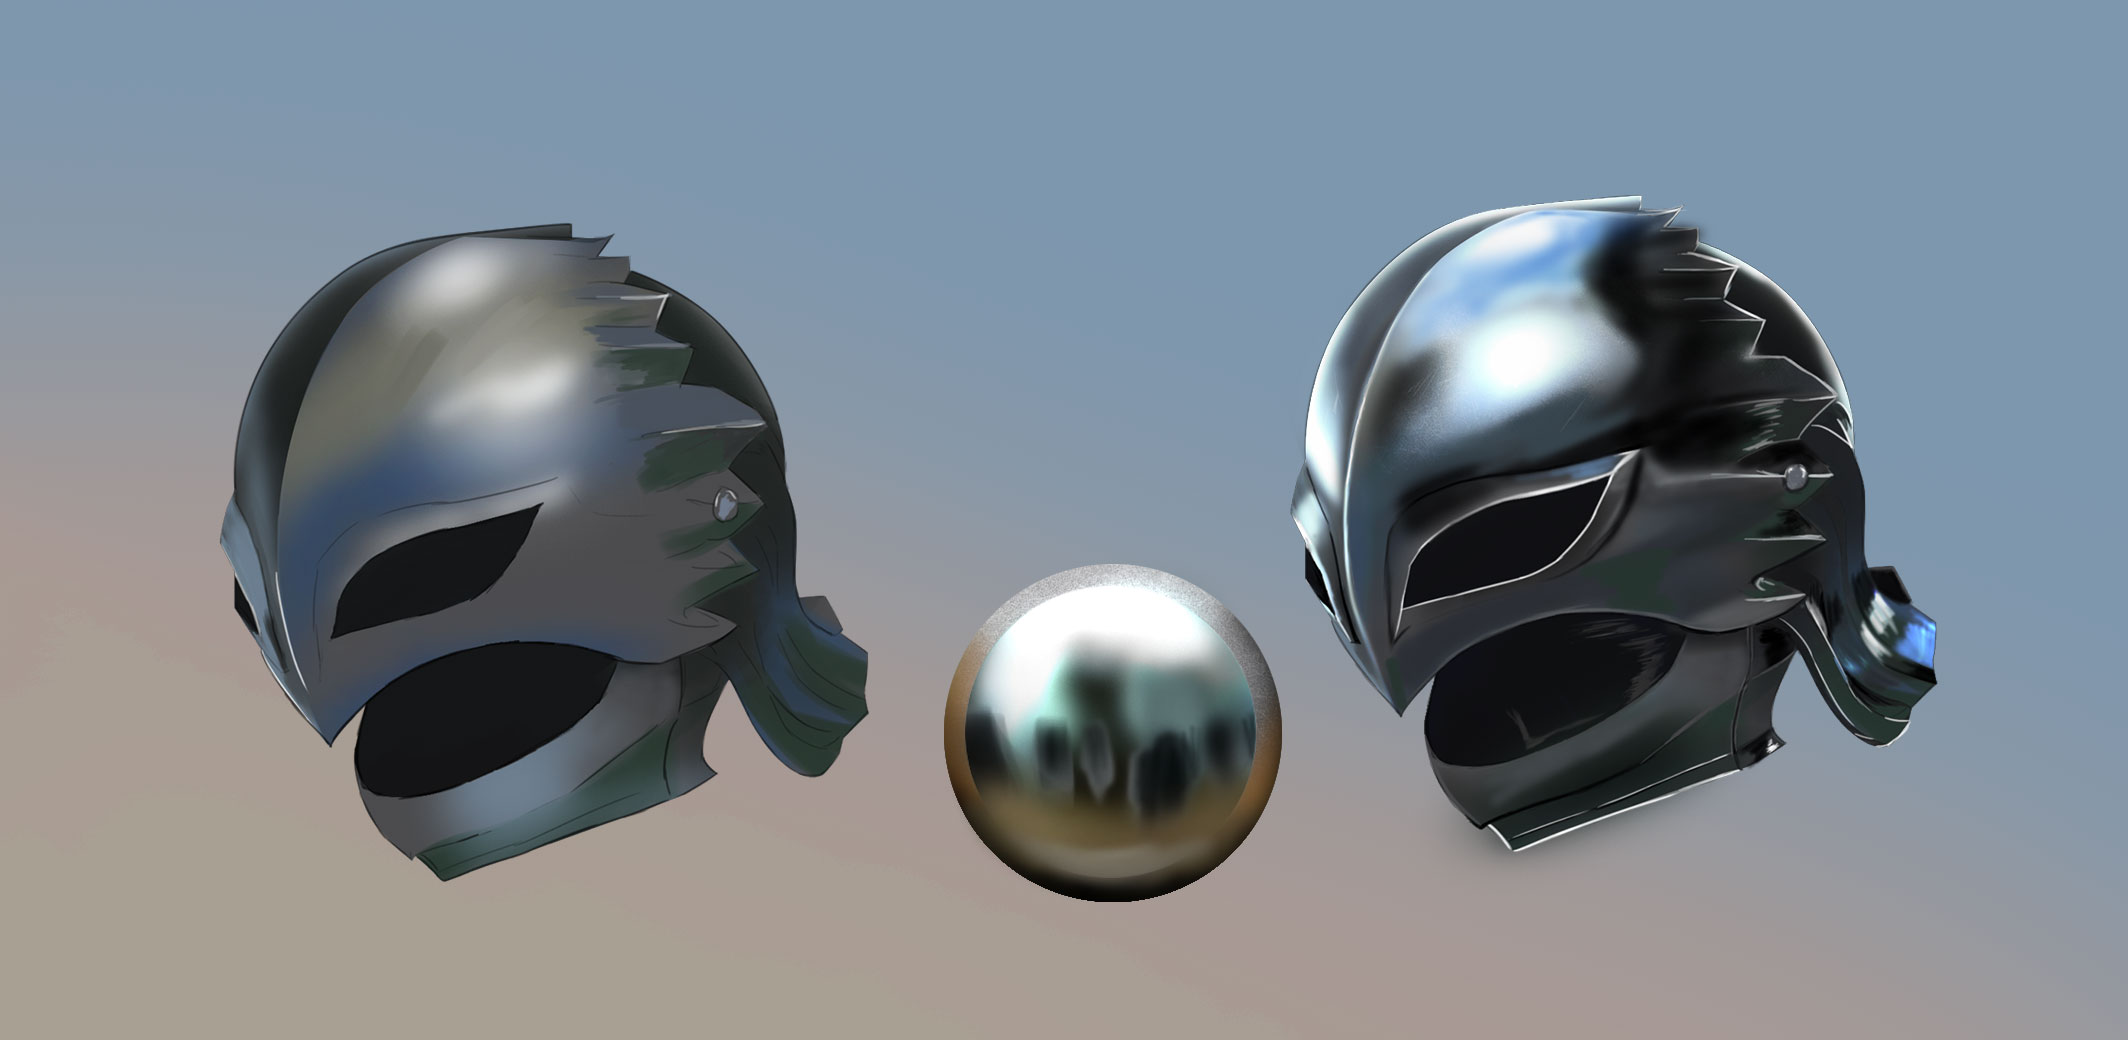
To render realistic metal start with base colors that reflect the environment Add lighting to define the form then finish with reflections and small texture details like scratches Practice on simple shapes match colors to the scene and don’t overdo the texture metal needs to shine Different metals have different levels of roughness and reflectivity so it helps to study them in 3D
Check out real-world references at Architextures Metal Library to see how various surfaces behave
Why Rendering Metal Can Be Tricky But Totally Worth It
Painting metal whether in digital or traditional artis all about mastering reflections and light Unlike other materials metal bounces back the colors and shapes around it which makes it challenging but also super rewarding once you get the hang of it This guide breaks down how to paint realistic metal in three clear steps
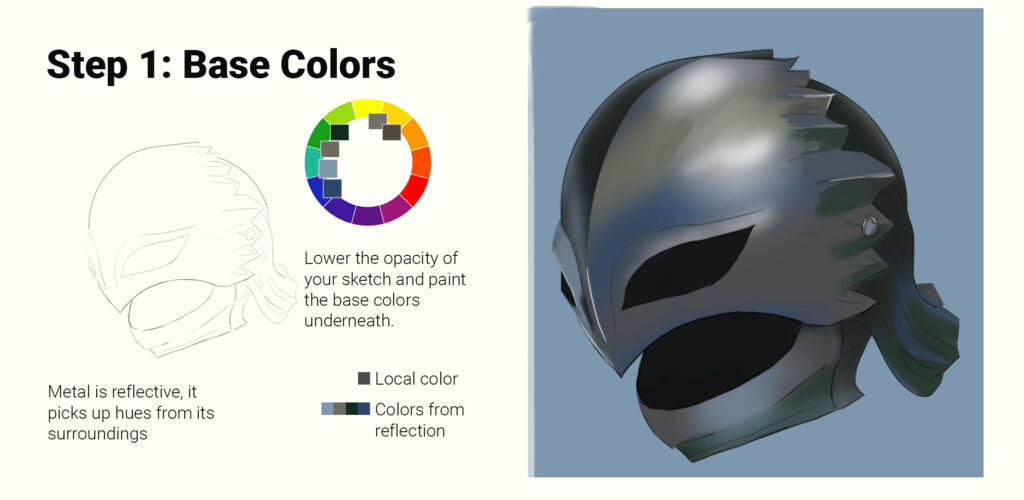
Step 1: Block In Your Base Colors
Lower your sketch’s opacity so you can work underneath it Then start blocking in your base colors Since metal reflects its surroundings think about where the object is placed Is it in warm sunlight Use soft oranges or yellows A colder scene Add hints of blue or green Choosing the right colors here sets you up for realistic lighting and reflections later

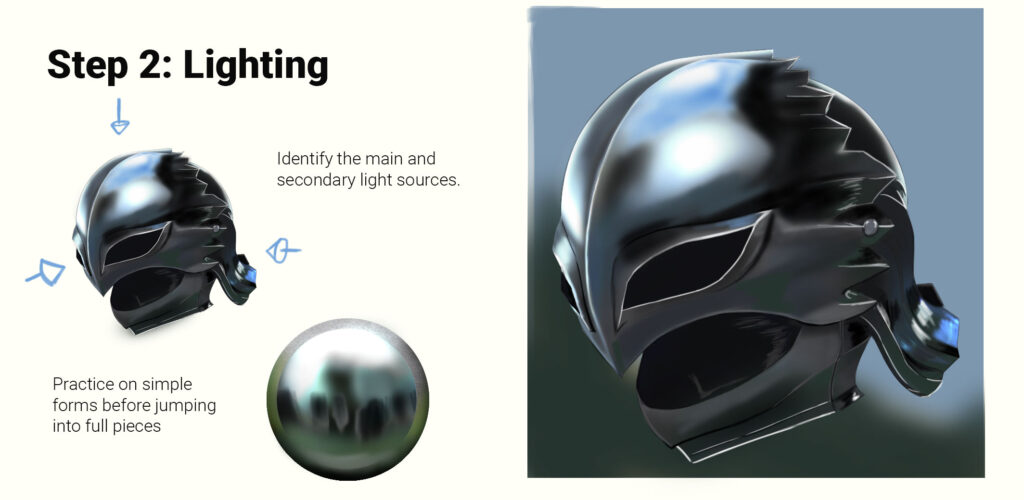
Step 2: Add Light to Shape the Form
Now start working in the light Think about your main light source and any secondary ones Use light to emphasize the form of the object For example a thin highlight can turn a sketchy outline into the sharp edge of a blade or armor plate Still getting used to metal Practice with basic shapes like spheres and cylinders This helps you understand how light wraps around reflective surfaces

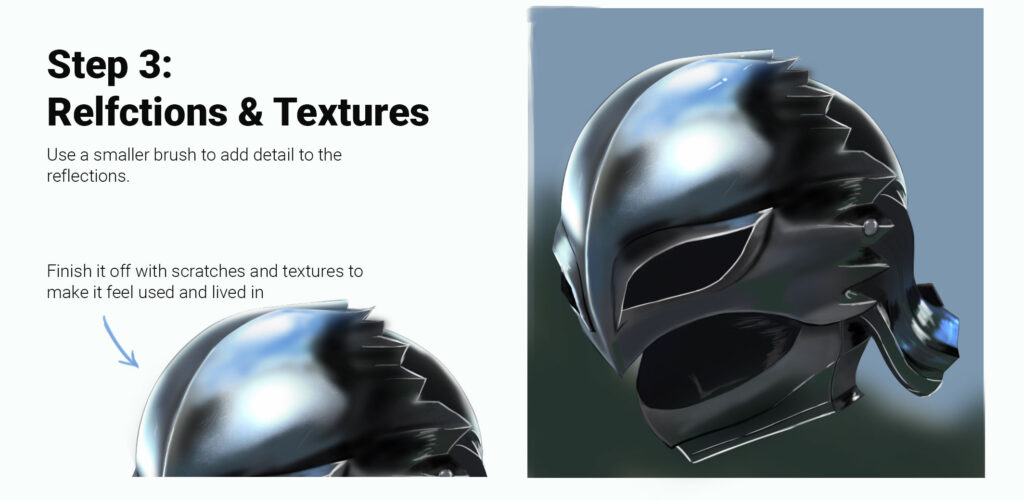
Step 3: Add Realistic Reflections and Surface Details
This is what brings metal to life Use a smaller brush to paint reflections of nearby objects onto the metal surface This helps sell the illusion that the metal is part of a real scene Then add small scratches dull areas or worn spots These details give the object character because no real piece of metal is perfectly clean

Final Tips for Rendering Realistic Metal
- Keep practicing with simple forms to build confidence
- Match your reflections to the actual environment for better realism
- Don’t overdo texture too much can cancel out the shine
For more painting tutorials check out our Beginners Guide to Digital Rendering and How to Paint Realistic Skin Tones
Discover More Posts
Keep exploring stories, insights, and creative notes from my journey as an artist. Check out the latest blog entries and find topics that inspire your own process.

How to Draw Stunning Anime Clouds
Learn to draw anime-style clouds with this easy, step-by-step cloud tutorial. You’ll pick up tips on shapes, color, and composition—plus get free cloud brushes to use in your own art.

How to Draw Clothing Folds: The 6 Essential Types Every Artist Should Know
Learn the 6 main clothing folds to make your fabric drawings more realistic and dynamic

How to Draw Anime Hair: The Ultimate 6 Easy Steps
Learn how to draw anime hair step by step. This beginner-friendly guide covers sketching, shading, highlights, and popular styles for male and female characters. Perfect for artists who want to master flow, volume, and shine in their anime hairstyles.

