
Not sure what canvas size to use? I’ve got you—check out my canvas size guide to set up your file with the right dimensions from the start.
And to make things easier, there’s a free downloadable sky brush you can grab to speed things up.
In this cloud tutorial, you’ll learn how to:
- Paint large, dramatic cumulonimbus clouds
- Create long, stretched evening clouds near the horizon
- Add delicate cirrus, cirrocumulus, and altocumulus cloud layers
Bonus techniques:
- Watch a speedpainting demo from start to finish
- Add atmospheric depth to your skies
- Use rim lighting for glowing cloud edges
- Create light rays for a more dynamic look
- Paint subtle, moody night clouds
Recommended Brush Settings:
Shape Dynamics:
- Size Jitter: Random brush tip size (control with pen pressure)
- Angle Jitter: Random rotation
- Roundness Jitter: Slight squish of brush shape
- Minimum Diameter & Roundness: Adjust as needed
Scattering:
- Scatter: Enable Both Axes
- Count: Set to 1–2 for subtle variation
Step 1: Understanding Clouds
Before you jump into painting, it helps to understand how clouds behave. They might look soft or surreal, but they still follow the same lighting and shading principles as any other object. Depending on how dense they are, clouds can appear translucent or reflect light in unexpected ways. If you’re new to light and form, I recommend checking out a few basic lighting tutorials to build a solid foundation.
- Study lighting basics (I’ll create lighting tutorials soon!)
- Look at real cloud references on Google Images.
- Practice outlining different cloud types: cumulus, cirrus, nimbus, etc.

Understanding Cloud Types (Quick Tutorial for Anime Artists)
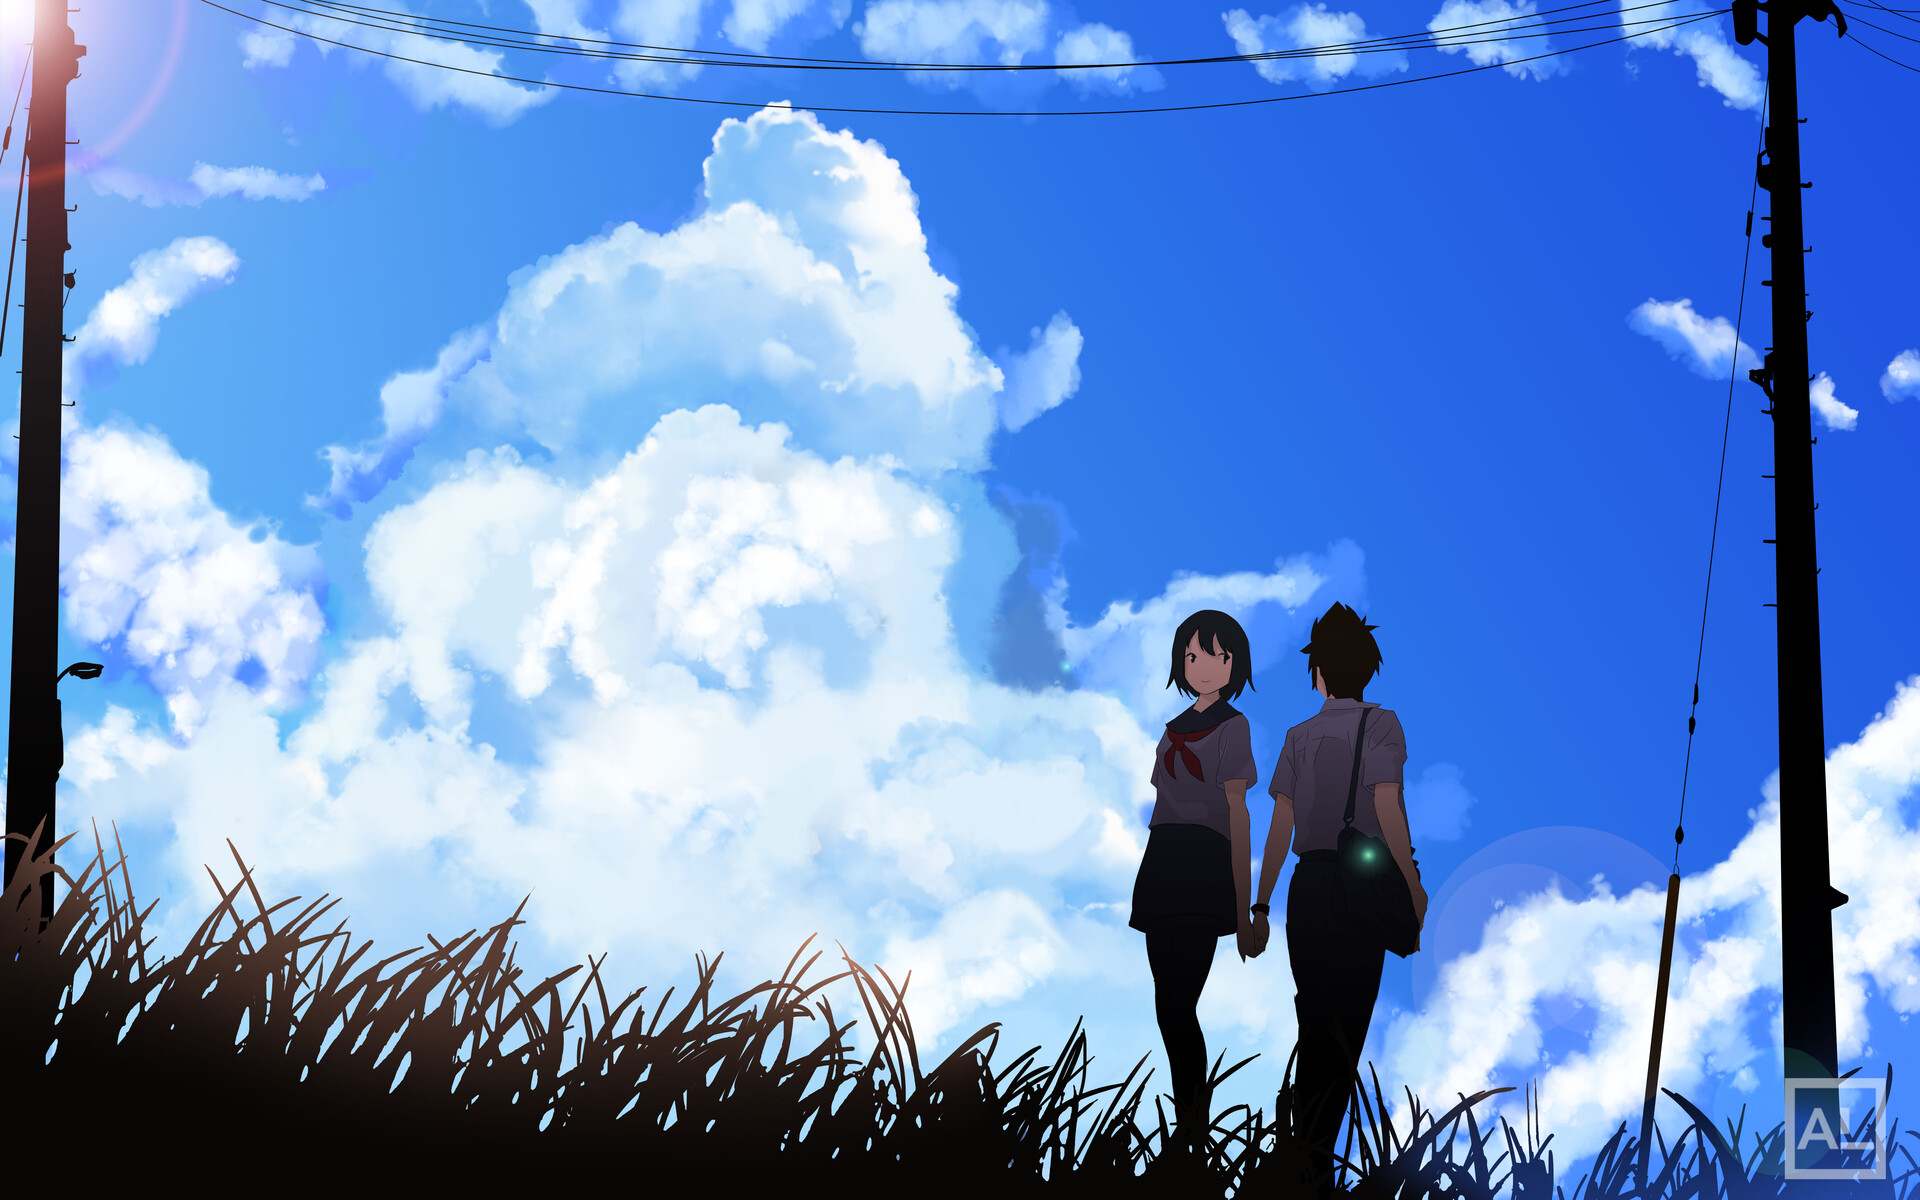
If you’ve ever paused an anime just to admire the sky, you already know how much personality clouds can add to a scene. Learning the different cloud types helps you draw skies that feel alive, not just painted in.
Here’s a quick guide to the main cloud families and what their names mean:
| Prefix | Meaning | Common Cloud Types |
|---|---|---|
| Cirro | High, icy clouds that float above 20,000 feet | Cirrus, Cirrostratus, Cirrocumulus |
| Alto | Mid-level clouds that often look soft or layered | Altostratus, Altocumulus |
| Strato | Low, wide sheets that stretch across the horizon | Stratus, Stratocumulus |
| Cumulo | Puffy or piled-up clouds with dramatic volume | Cumulus, Cumulonimbus |
| Nimbo / Nimbus | Clouds that bring rain or storms | Nimbostratus, Cumulonimbus |
When you’re painting or animating skies, mix different cloud types to match the mood.
- Use cirrus clouds for a calm, dreamy anime morning.
- Try cumulonimbus when you want that heavy, pre-battle tension.
- Altocumulus layers can make sunsets feel textured and full.
Want to go deeper? Check out this cloud chart from the National Weather Service for a full overview of cloud classifications and what they look like in real life.

Step 2: Planning Your Clouds: Shape, Placement, and Color
When drawing anime clouds, it helps to think about how real clouds behave in nature. The more believable your shapes and colors, the more emotion your sky will carry in your anime scene.
1. Cloud Shape Matters

Avoid drawing clouds that look too clean or symmetrical. Real clouds drift, stretch, and twist in the wind, they’re never perfectly balanced.
If your cloud looks like it was folded in half, it’ll feel stiff and artificial. Go for uneven, organic shapes that look loose and full of motion.
In a semi-realistic anime style, that slightly messy look adds depth and keeps your clouds feeling alive.

The shape of clouds changes depending on the angle you’re viewing them from. When a cloud is close to you, you’re seeing it mostly from below—broad and rounded underneath. As clouds move farther away toward the horizon, you start to see them from the side, appearing thinner and more stretched across the sky.
2. Scatter, Don’t Line Up
Evenly spaced clouds can make your sky feel flat, almost like wallpaper. Instead, scatter them naturally. Mix large, soft clouds with smaller wisp, leave open gaps, and let them overlap. This kind of flow gives your anime sky a sense of energy and distance, as if the wind itself is shaping the scene.
3. Use Color to Set the Mood
Color is everything in anime clouds. A small shift in tone can change the entire feeling of the sky.
- Daytime: soft whites and cool, pale blues
- Sunset or magic hour: warm oranges, pinks, and purples
- Night: deep blues, muted purples, maybe a hint of teal for mystery
Think about the emotion behind your anime moment. A lonely sunset might use fading pink clouds, while a hopeful dawn cloud glows with light gold edges. Let the color of your clouds echo the story you’re telling.
If you’re curious about how color affects mood (and why it works that way), I wrote a quick breakdown here color theory

Step 3: Set Up Your Canvas and Paint Anime Sky
Before you start painting clouds, it helps to build a strong base. Start by setting up your canvas properly. your final image quality depends on it.
Not sure what canvas size to use? This guide breaks it down with real examples:
Once your canvas is ready, paint the gradient for your sky:
- Morning → White near the horizon fading into pastel blue or pink
- Evening → Warm orange at the bottom fading into deep blue or purple
- Night → Deep navy or indigo into black for a starry sky
Use the Gradient Tool to create a smooth transition. Keep the gradient soft by adjusting opacity or blending modes.
Then, add a new layer for clouds. that way you can adjust or edit them without messing up your background.
Step 4: Paint Diverse Cloud Types
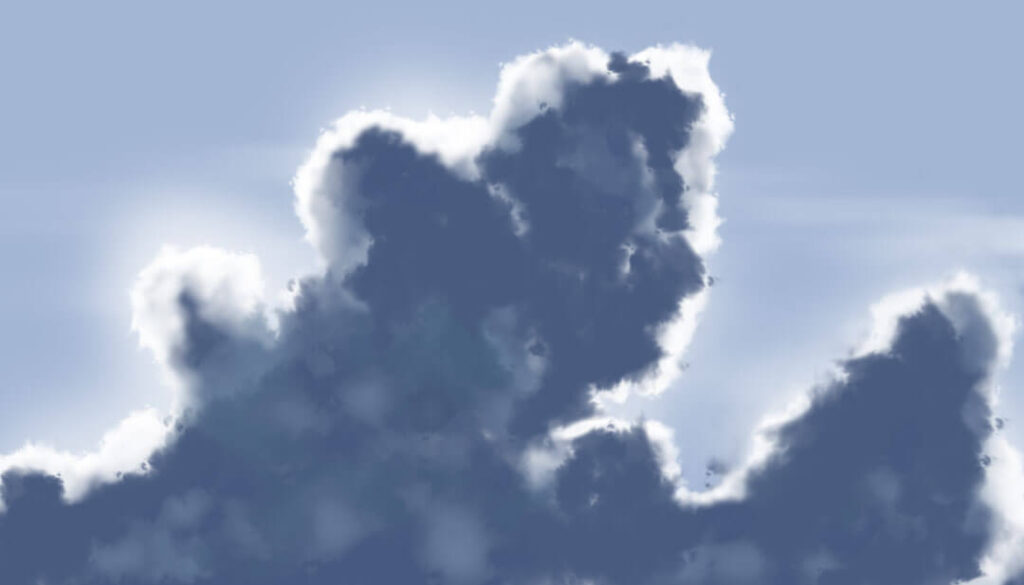
How to draw cumulonimbus Clouds (Summer Clouds)
In anime, those huge, towering cumulonimbus clouds often define summer scenes. They rise high into the sky, glowing with heat and light, and instantly set that nostalgic summer mood you see in so many anime skies. Here’s how to paint them step-by-step.

1. Start with a Strong Base
Begin by sketching the main shape of your cloud using a slightly darker tone. This creates a solid base to build up from and helps your anime cloud feel heavy and realistic. Keep the bottom dense and shadowed—it’s the foundation of the cumulonimbus.
2. Add Light and Volume
Lock your layer’s transparency, then paint from dark to light. Focus on where the sun hits your cloud—the brightest edges should face your light source. Gradually blend the tones so your anime cloud looks three-dimensional, not flat.
3. Blend the Texture
Use the Smudge Tool to gently soften the edges inside the cloud, keeping that billowy texture. Then unlock the transparency and lightly smudge the outside edges for that soft, airy feel—like the cloud is slowly fading into the summer sky.

4. Control the Mood with Color
Just like in the previous section, remember that changing your color palette can shift the time of day without changing the cloud type. A cumulonimbus cloud at noon might shine bright white and blue, while the same cloud at sunset glows orange and pink.
Keep that in mind across other cloud types too, whether it’s cirrus or stratocumulus, the color shift shows a new hour, but they’re still the same clouds under different light.

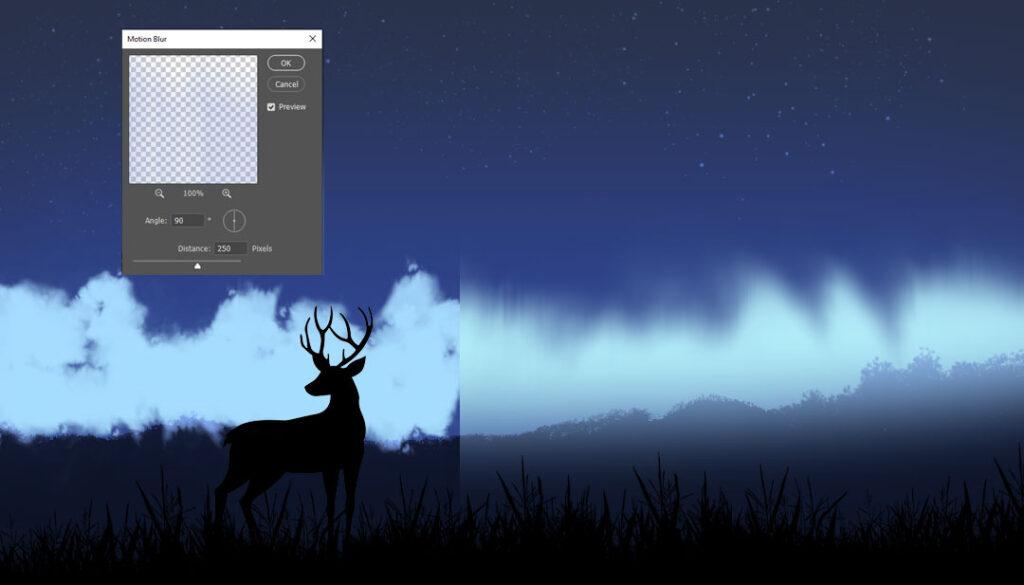
How to Paint Long Evening Clouds (Anime Sunset Skies)
In anime, long, glowing evening clouds near the horizon often steal the scene. They stretch across the sky like soft ribbons of color, guiding the viewer’s eye toward the sunset. Painting these anime clouds well can turn a simple background into something cinematic and emotional.
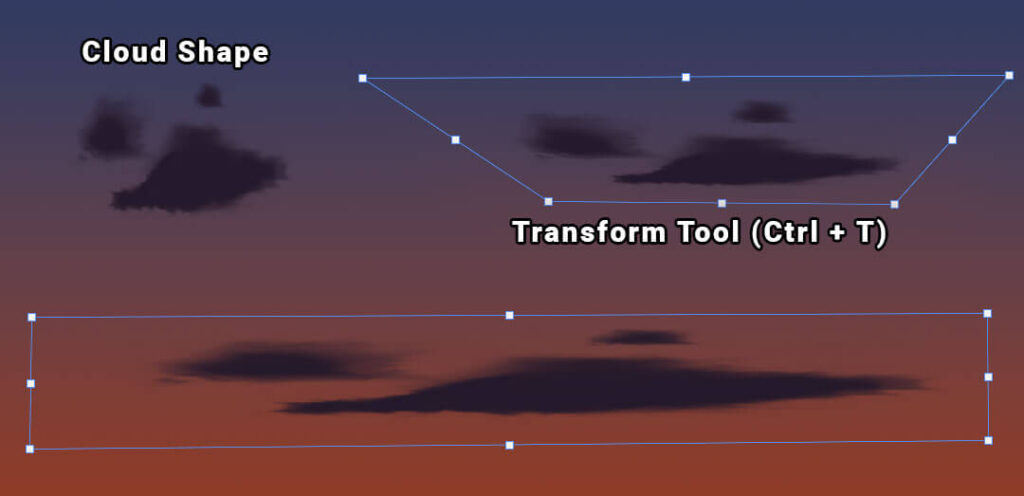
1. Build the Shape
Start by painting a wide, horizontal cloud shape close to the horizon. Keep it slightly uneven—real clouds never stay perfectly straight. A bit of curve or break makes the anime sky feel more natural and alive.
2. Adjust the Perspective
Use the Transform tool (Ctrl + T) to gently squish or skew the cloud so it follows the scene’s perspective. This helps your anime clouds feel like they’re receding into the distance, wrapping around the horizon instead of floating flat across it.
3. Add Light and Depth
Decide whether you want a soft, painted look or a clean, graphic one. For more realism, add gentle shading to the lower edge of the cloud to suggest volume. For a stylized anime finish, keep the shape flatter and let color do the storytelling.
4. Use Color for Atmosphere
As with other cloud types, remember that your palette changes the hour, not the cloud itself. Warm oranges and pinks make your anime clouds glow with sunset light, while deeper purples and reds can turn the same clouds into a moody twilight sky.
Cirrus clouds are those thin, feather-like streaks that drift high above the sky. In anime art, they’re perfect for softening bright daylight scenes or adding a quiet sense of movement and distance.
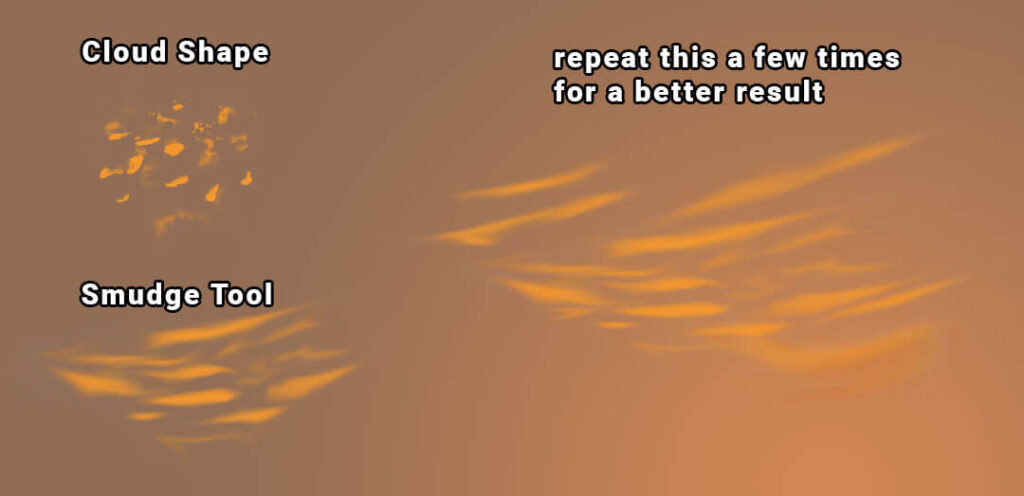
1. Sketch the Shape
Use a soft brush to draw light, sweeping strokes. Cirrus clouds should feel almost weightless—think of them as trails of wind rather than solid shapes.
2. Blend Gently
Blend the edges just enough to keep them airy and delicate. Avoid over-smudging; you still want a bit of texture so the clouds feel natural, not foggy.
3. Choose the Right Colors
For a clear daytime sky, stick with bright whites and pale blues. During sunset, shift to warm tones—soft pinks, golds, and hints of orange—to catch that glowing anime light that makes evening scenes so inviting.
How to Paint Cirrocumulus & Altocumulus Clouds (Cluster Clouds)
Cirrocumulus and altocumulus clouds appear as rippled or clustered patches that spread across the sky. In anime backgrounds, these cloud types add depth, rhythm, and texture—perfect for calm morning skies or quiet afternoon scenes.
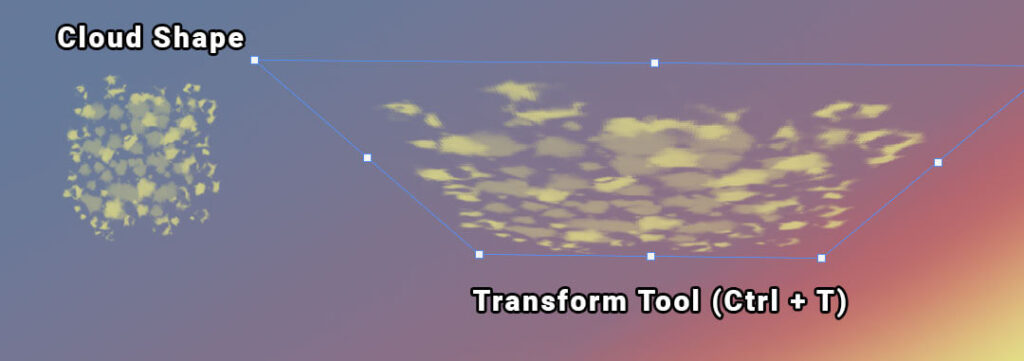
1. Build the Cluster
Use a soft round brush to paint many small cloud shapes, varying their opacity, size, and spacing. Cirrocumulus clouds should look fine and delicate, while altocumulus clouds can be slightly larger and puffier. Keep their edges light so they blend naturally into the sky.
2. Add Perspective
Select the group and use Ctrl + T to stretch or distort them into perspective. The clouds should appear smaller and tighter as they move toward the horizon, helping your anime sky feel wide and full of distance.
3. Focus on the Impression
Don’t chase perfect accuracy—these clouds are about rhythm and pattern, not precision. Let your brushstrokes suggest texture rather than defining every shape. The goal is to make viewers feel the layered atmosphere that gives anime skies their subtle movement and depth.
Step 5: Bonus Tips for Painting Epic Anime Skies
Want to take your skies to the next level? These extra touches can add mood, depth, and cinematic energy to your scene.
Add Atmosphere and Glow
Use Rim Lighting to Make Clouds Pop
Add Light Rays or Moonlight
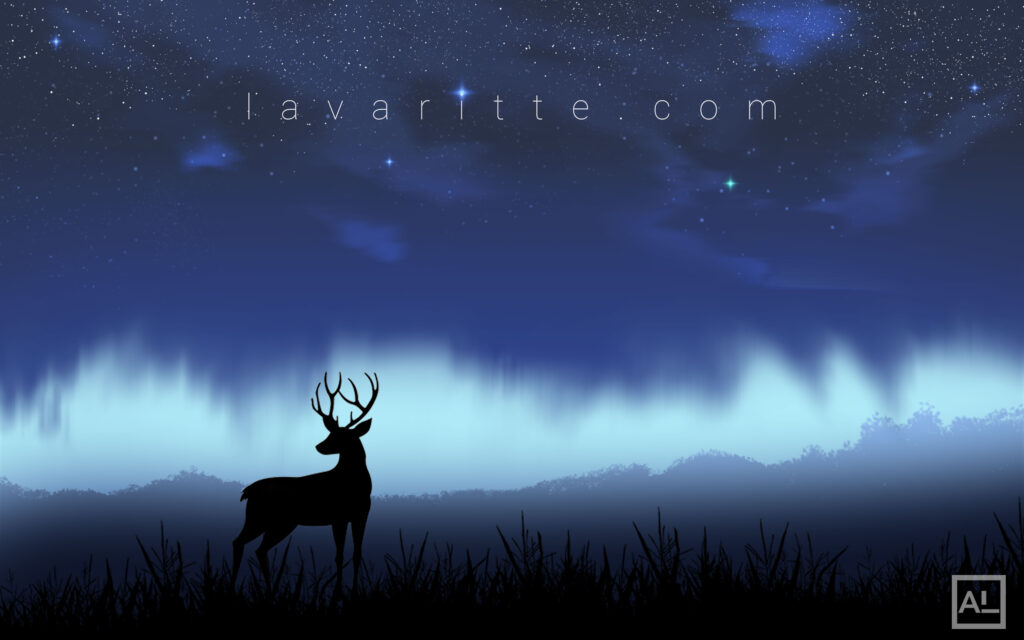
Night Clouds
Step 6:Tools Help, but Skills Matter More
There’s a great line from Tony Stark: “If you’re nothing without the suit, then you shouldn’t have it.”
Same goes for art — brushes and effects can help, but understanding form, light, and color is what really levels up your work.
So keep practicing, experiment with different skies, and most of all. enjoy the process.
Having Trouble with Default Brushes? You’re Not Alone.
That said, if you’re feeling stuck, it’s totally normal. Painting takes time, practice, and sometimes a little boost. I’ve put together a few custom brushes to help you get started faster:
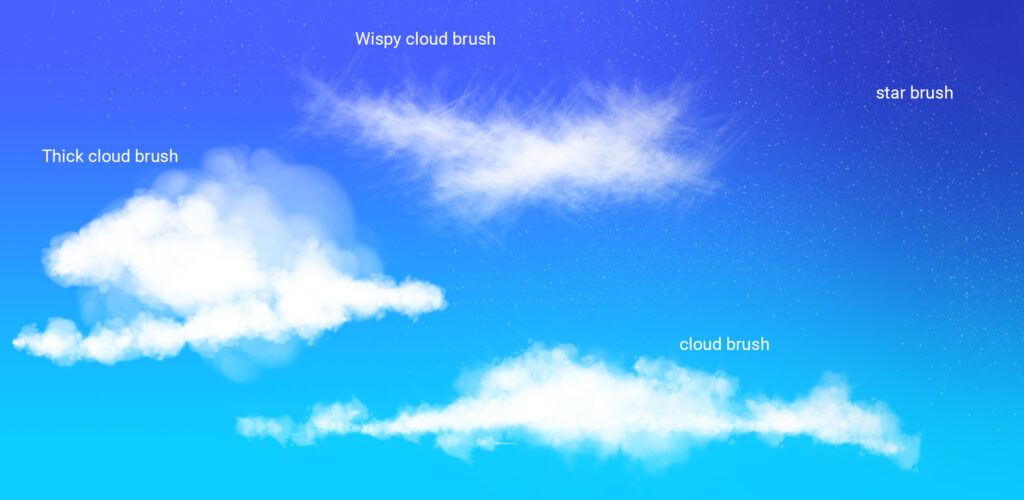
This set includes 3 cloud brushes and 1 star brush you can use throughout this tutorial. Once you’ve spent some time observing how different cloud types behave, you can even tweak these brushes or build your own.
After downloading, try them out in Photoshop and adjust the brush size or scatter settings to fit your style.
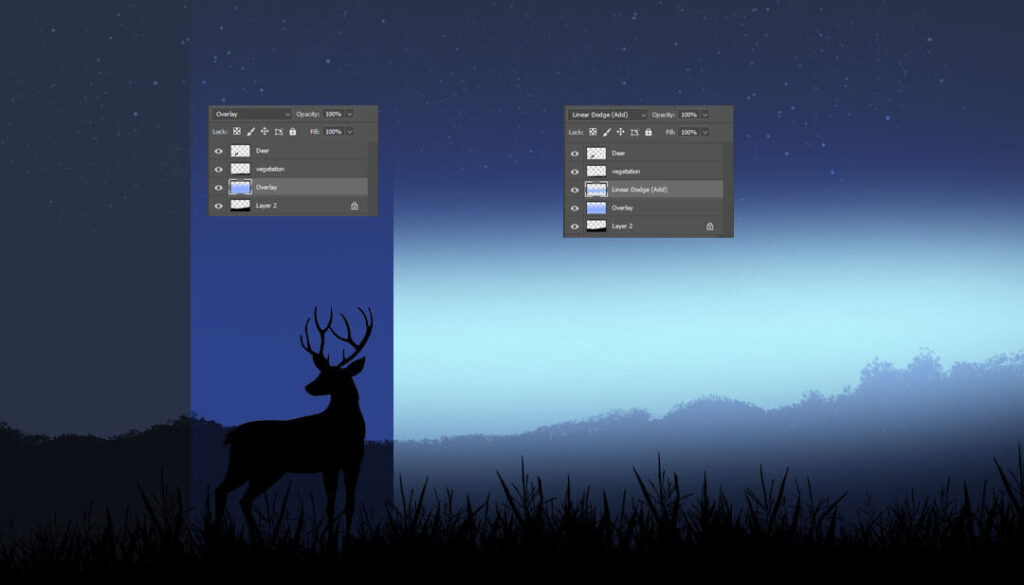
Bonus: A Faster Way to Shade with Layer Styles
Now for something a little more fun, let’s use Layer Styles to speed up your cloud shading without losing texture.
Start with a soft gradient, just like before, to set the base of your sky.

On a new layer, block in the basic shape of your clouds using the Thick Cloud Brush.
Use the Eraser Cloud Brush to tweak the edges until they feel natural.
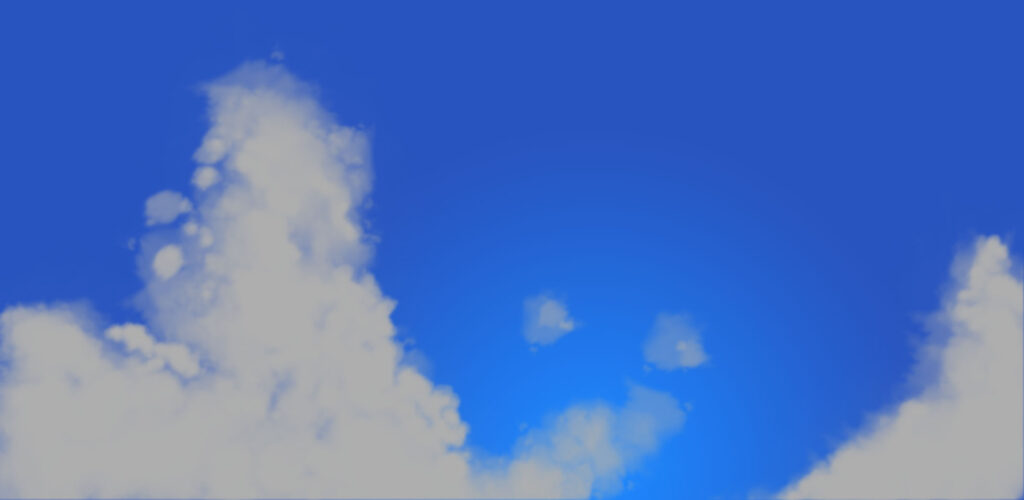
Lock transparent pixels, then add some simple shading. It’ll look decent, but it might still feel a bit flat, especially if you’re aiming for that fluffy, cotton-ball texture of cumulonimbus clouds.
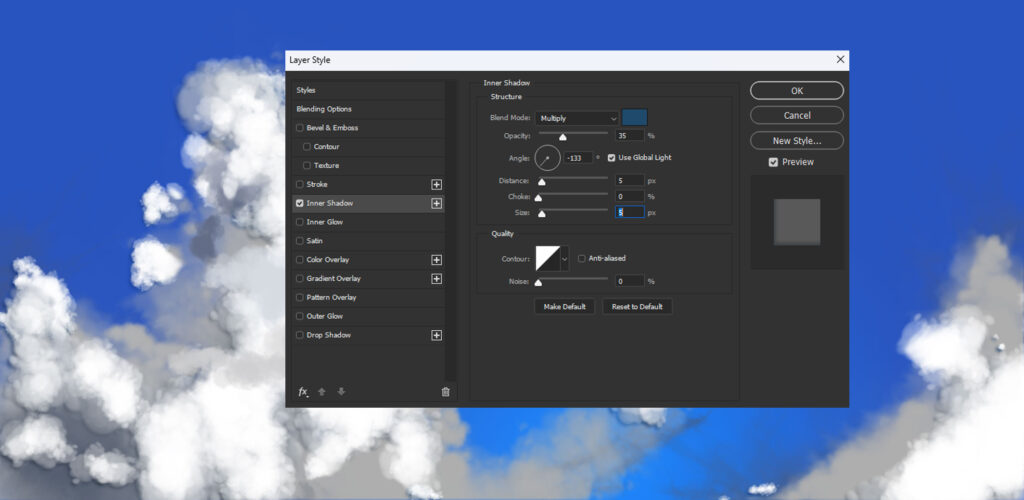
On a new layer, lightly dab in texture using the Thick Cloud Brush again — just enough to break up the surface.
Then go to:
Layer > Layer Style > Inner Shadow
Set the blend mode to Multiply, and adjust the Lighting Angle to match your scene.
This creates soft, built-in shading that adds depth without much effort.
You can repeat this process on a few more layers, changing up the opacity, brush size, or color until it looks just right.
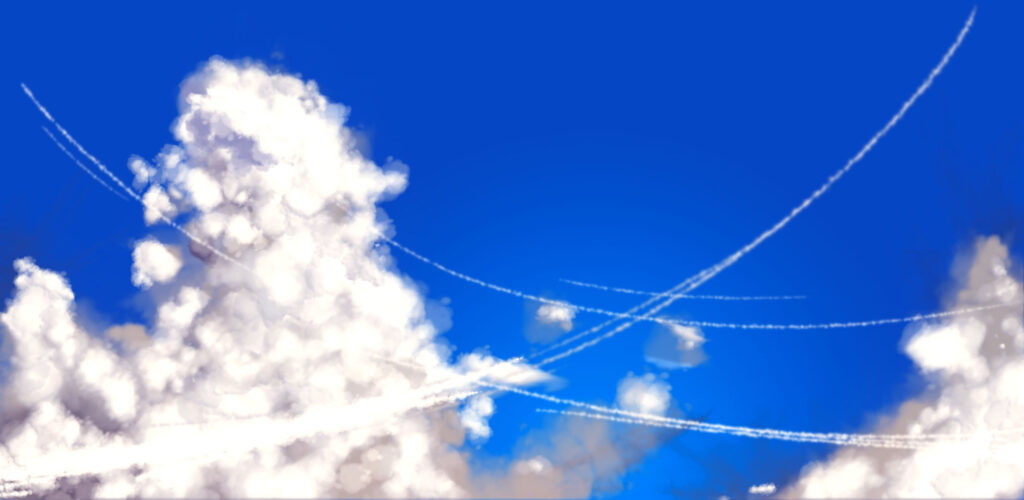
Want to add a little something extra? Use a smaller brush to paint a few subtle contrails — they add movement and detail to the sky.
Finally, tweak your color balance or add filters to bring the whole painting together.
Speedpaint Demo
Want to see it all come together?
Watch me paint clouds from scratch in this short demo video — you’ll see the full process, from base gradient to final lighting touches.
Final Thoughts
Thanks so much for reading! I hope this tutorial helped you get more comfortable painting skies and exploring atmospheric effects in your work.
And hey — as Bob Ross once said:
“Practice makes perfect — and happy little clouds make everything better.”
If you found this helpful, feel free to share it with other artists or follow along for more tutorials. Keep painting, and enjoy the process!
Discover More Posts
Keep exploring stories, insights, and creative notes from my journey as an artist. Check out the latest blog entries and find topics that inspire your own process.
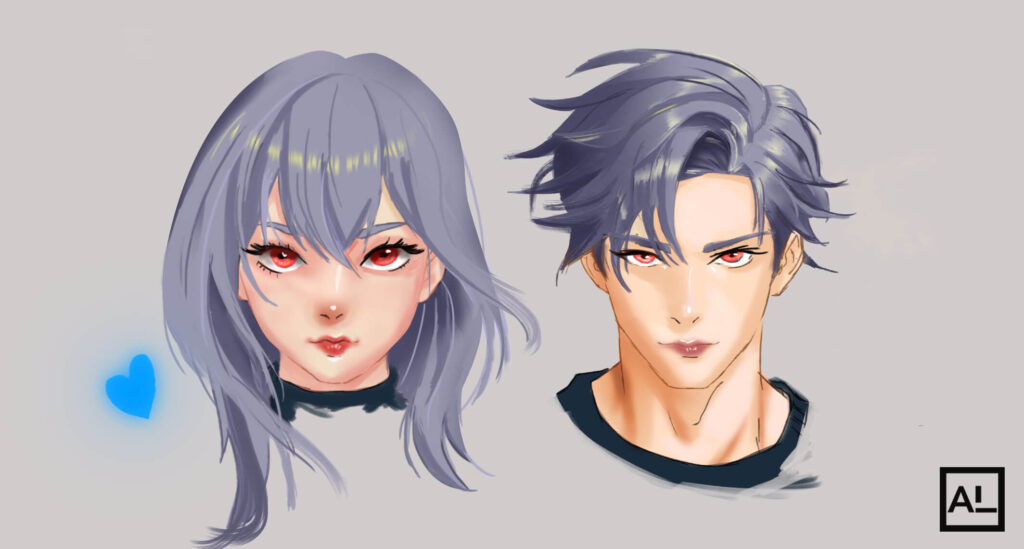
How to Draw Anime Hair: The Ultimate 6 Easy Steps
Learn how to draw anime hair step by step. This beginner-friendly guide covers sketching, shading, highlights, and popular styles for male and female characters. Perfect for artists who want to master flow, volume, and shine in their anime hairstyles.
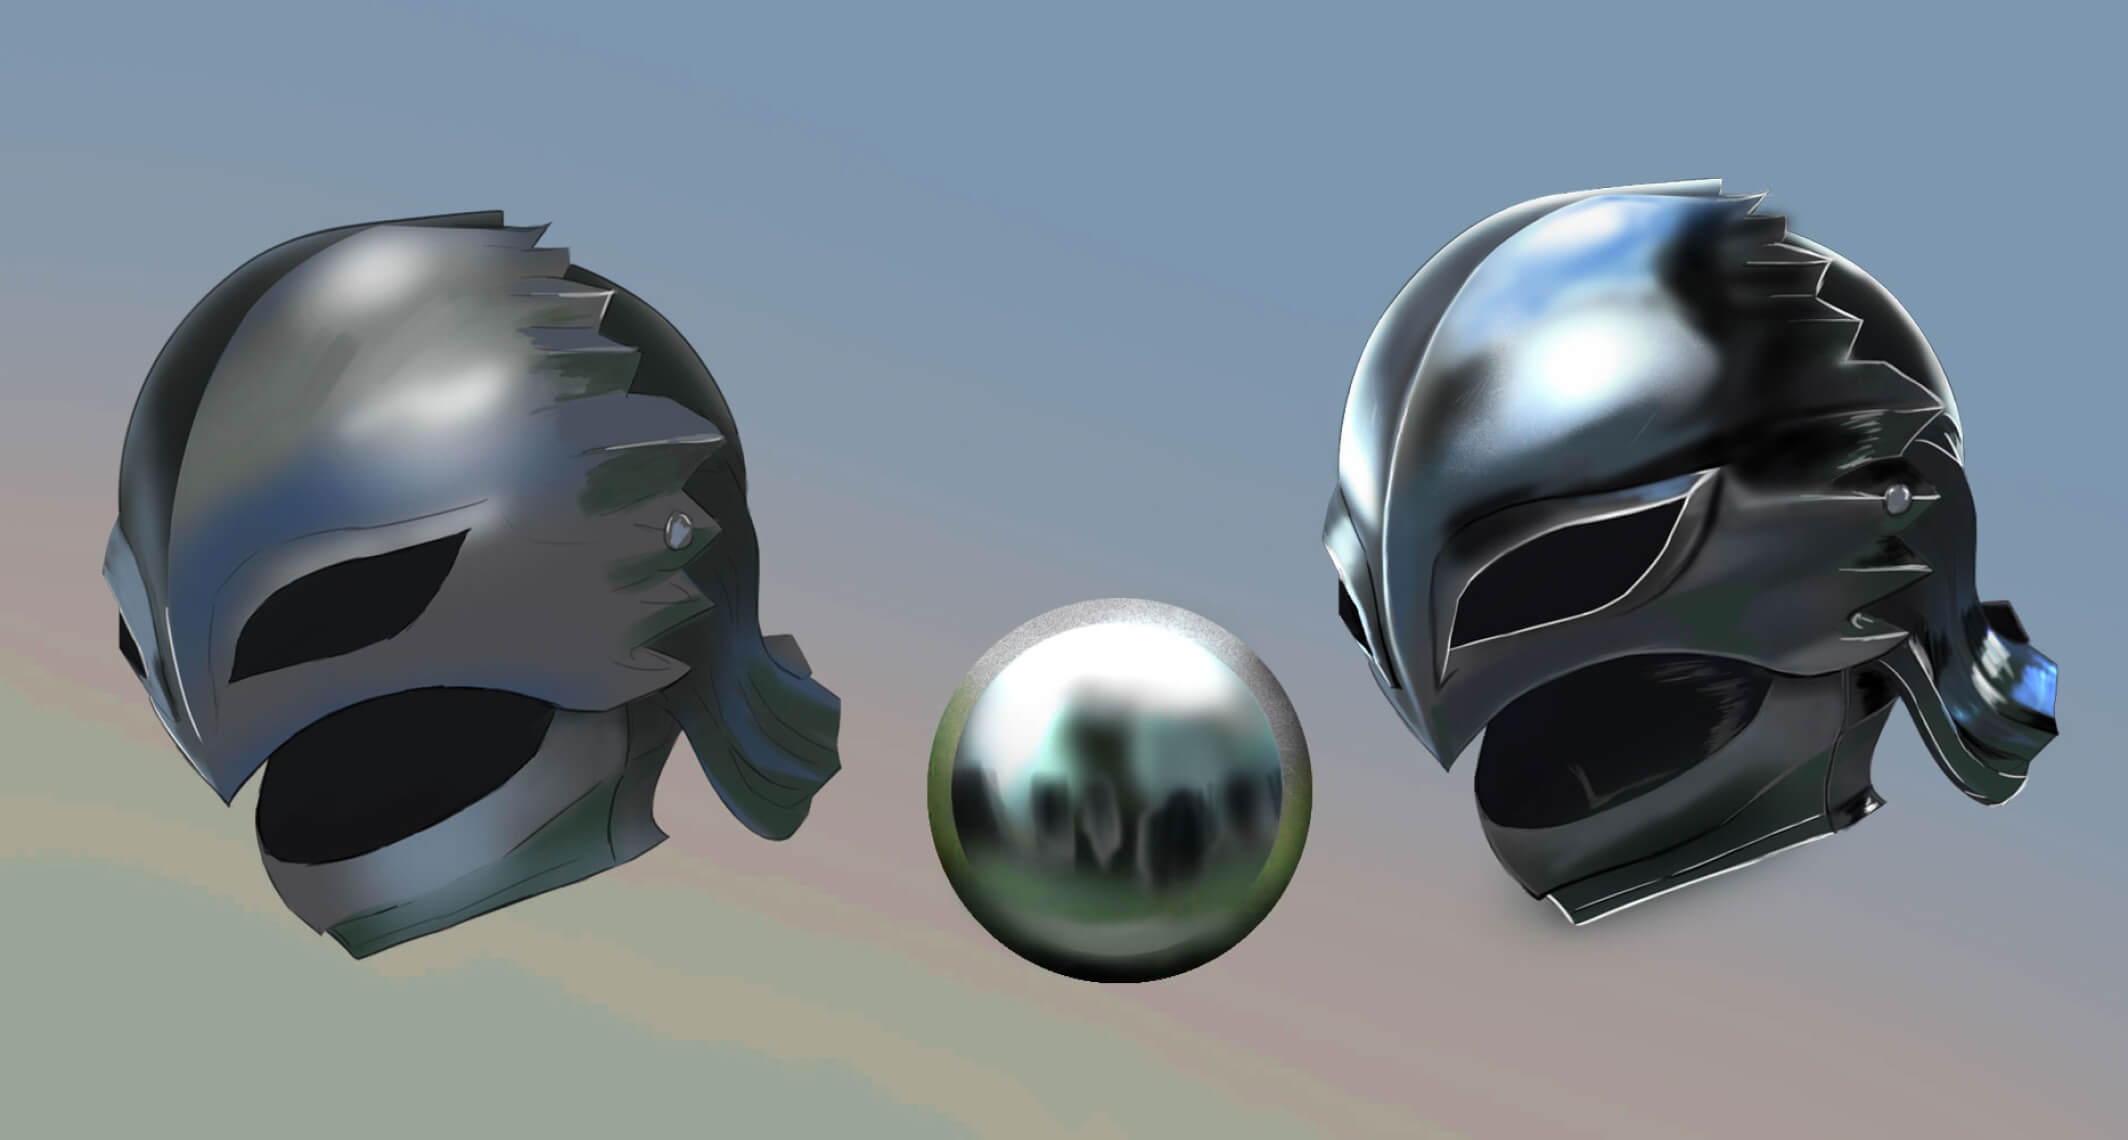
How to Paint Realistic Metal
Learn how to paint realistic metal with this step-by-step guide. From base colors to to lighting and reflections, get practical tips for your artwork shine, literally.
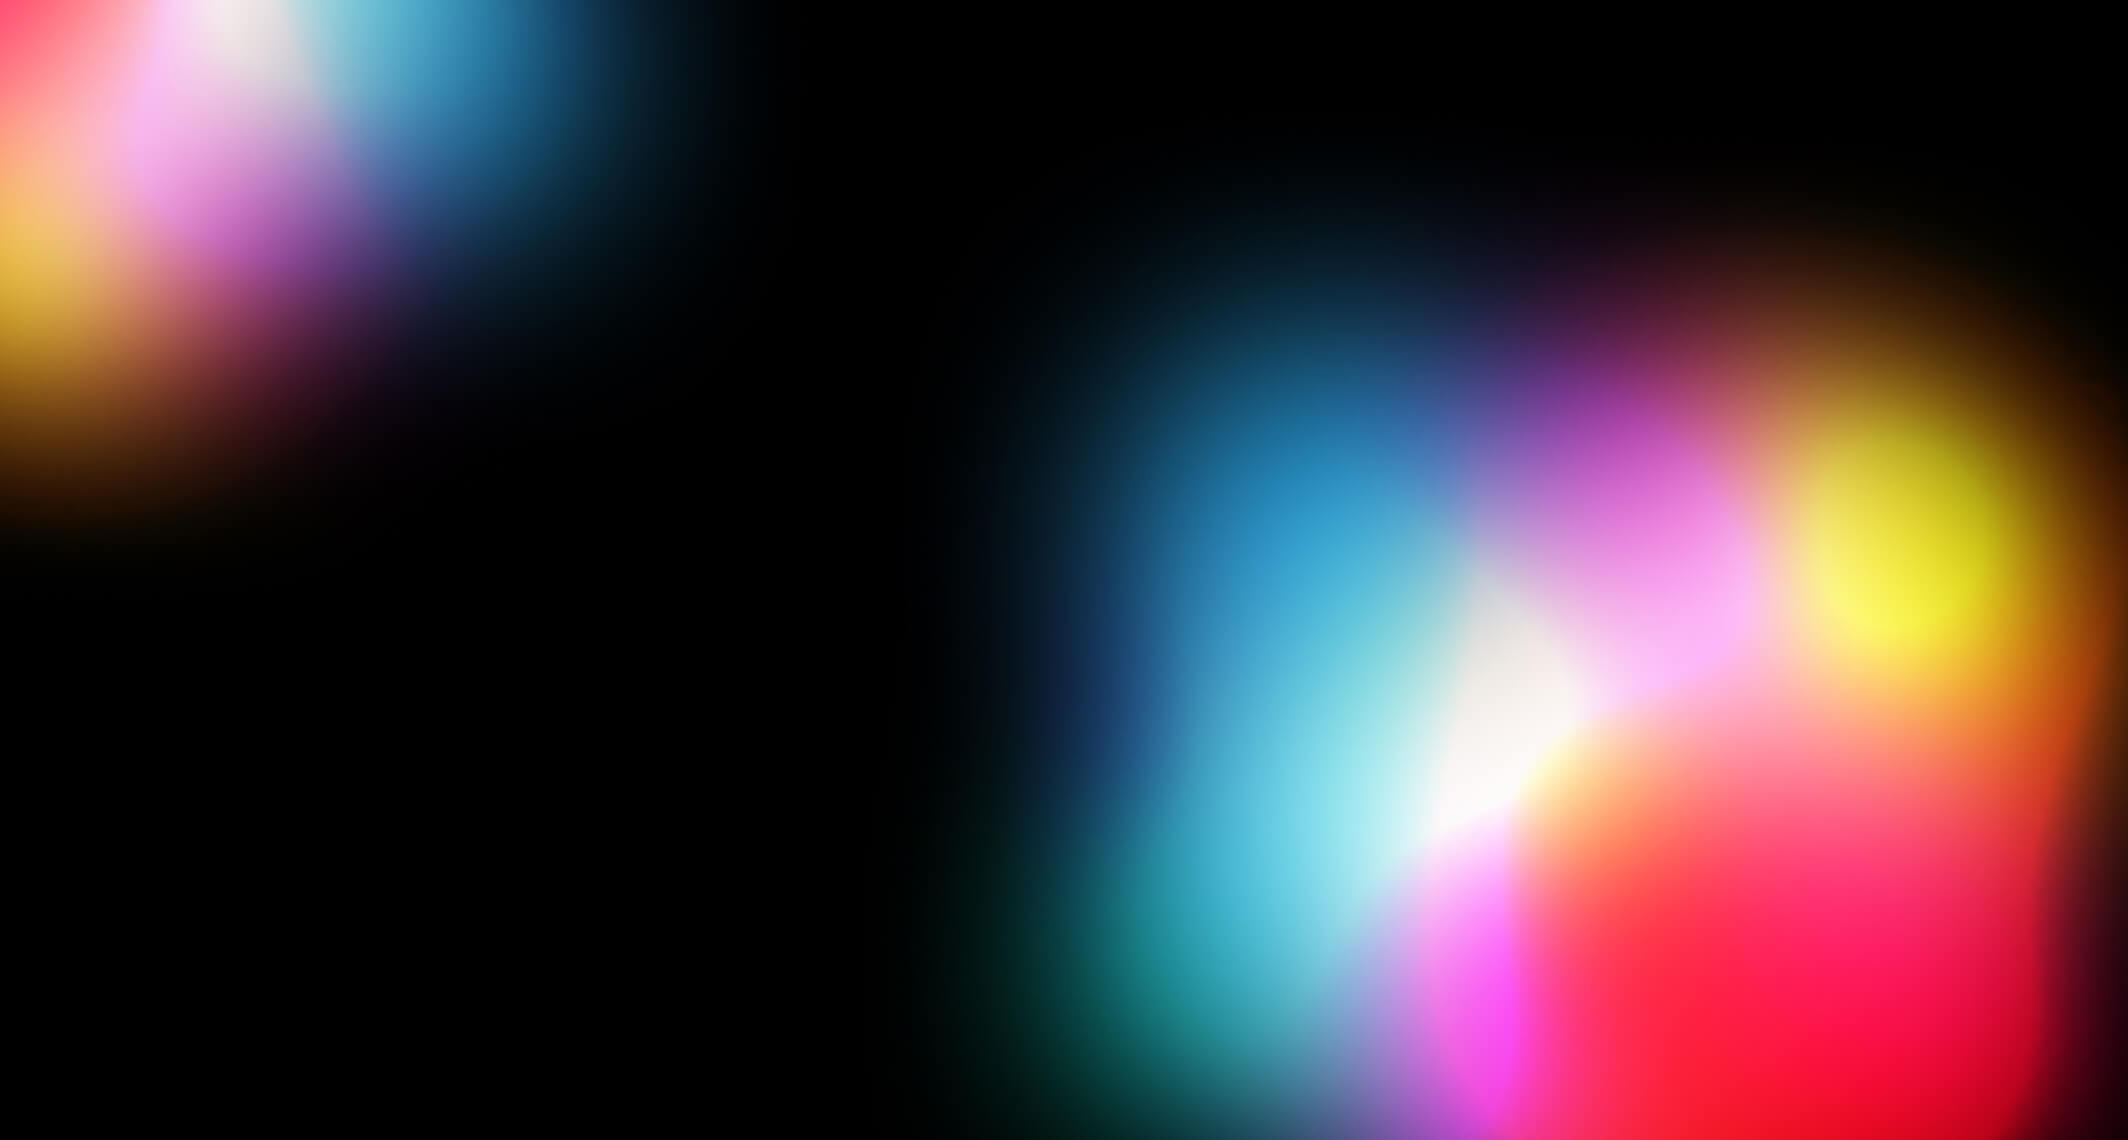
Color Theory Made Simple
New to Digital painting? This beginner-friendly guide breaks down hue, value, saturation, color harmonies, and practical tips to help you choose better palettes and level up your art.