
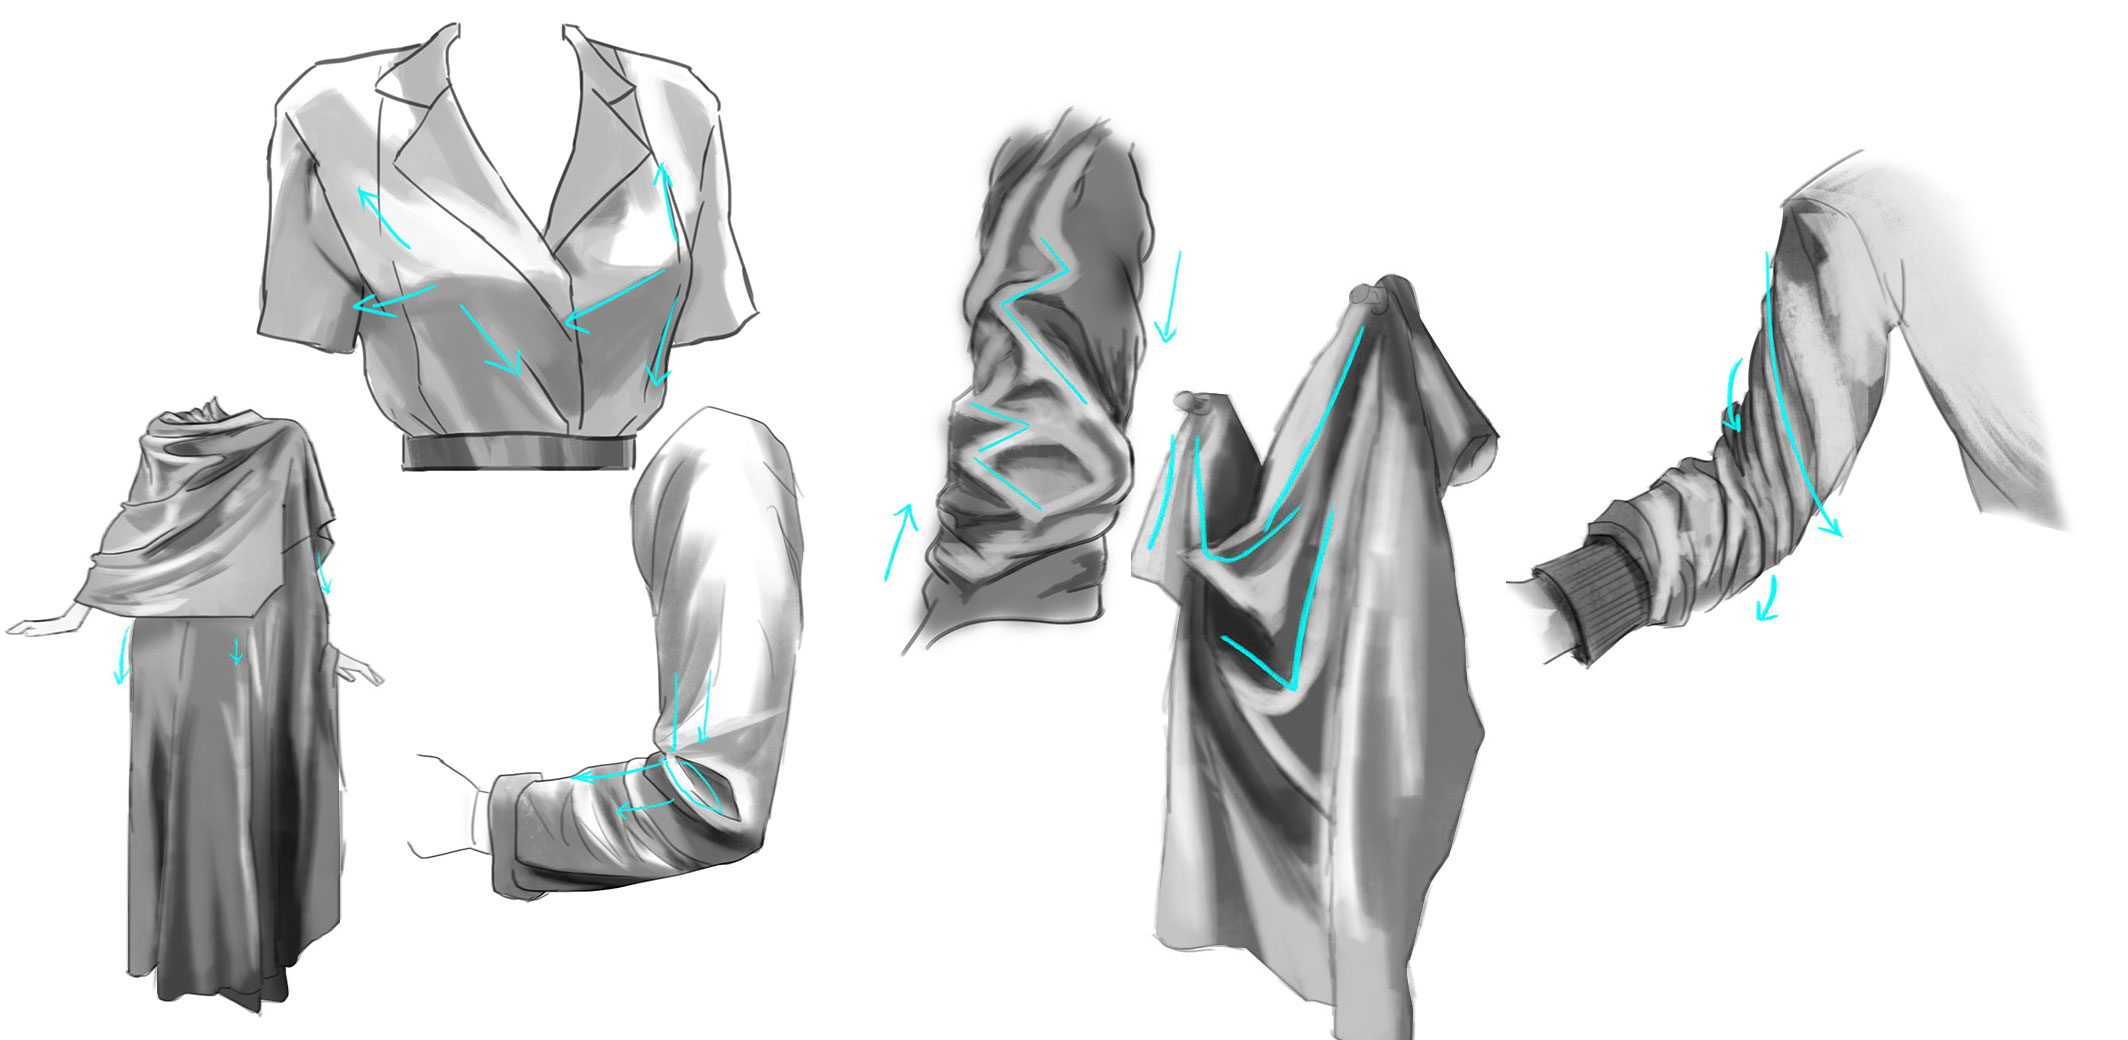
Want to draw clothing folds like a pro? even from imagination? It all comes down to learning the six main types of fabric folds, how they form, and where they appear on the body. Once you understand the structure behind each one, your characters will instantly look more realistic and grounded.
Let’s break them down.
First, Use References (Then Learn to Improvise)
The best way to get better at drawing folds is to study them from real life or reference images. Over time, though, experienced artists start drawing folds from imagination—and the secret to doing that is recognizing patterns.
Even the most chaotic-looking fabric folds follow some rules. Once you learn the six major types, you’ll be able to identify and replicate them anytime.
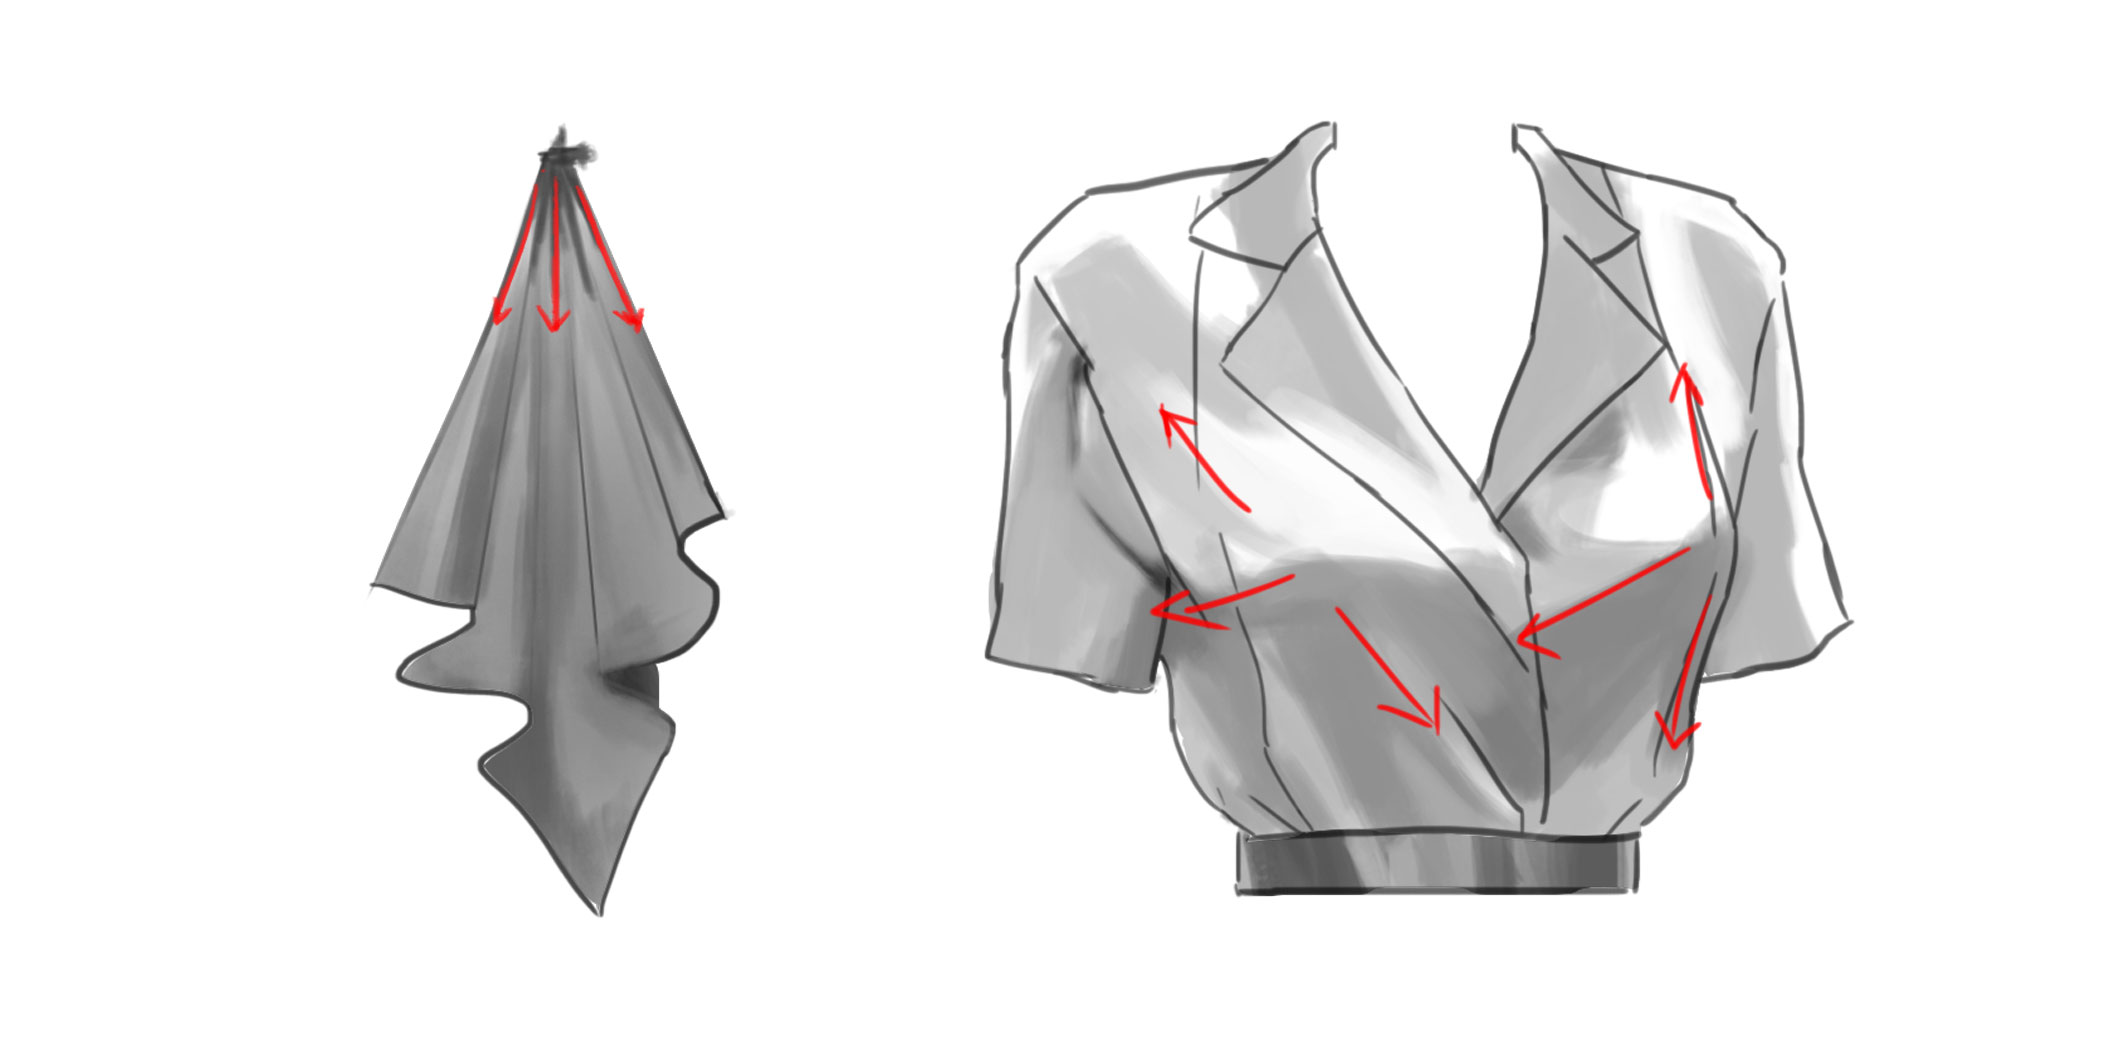
1. Pipe (or Cord) Folds
When they appear:
Anywhere there’s tension pulling on fabric—like elbows, knees, shoulders, or between two points pulling fabric tight.
What to look for:
Long, cylindrical folds that radiate out from the tension point. These folds diverge slightly and are never perfectly parallel.
Tip:
If someone is standing still in a t-shirt, the shoulders (and in some cases, the bust) are the main tension points, creating pipe folds along the chest and sleeves.
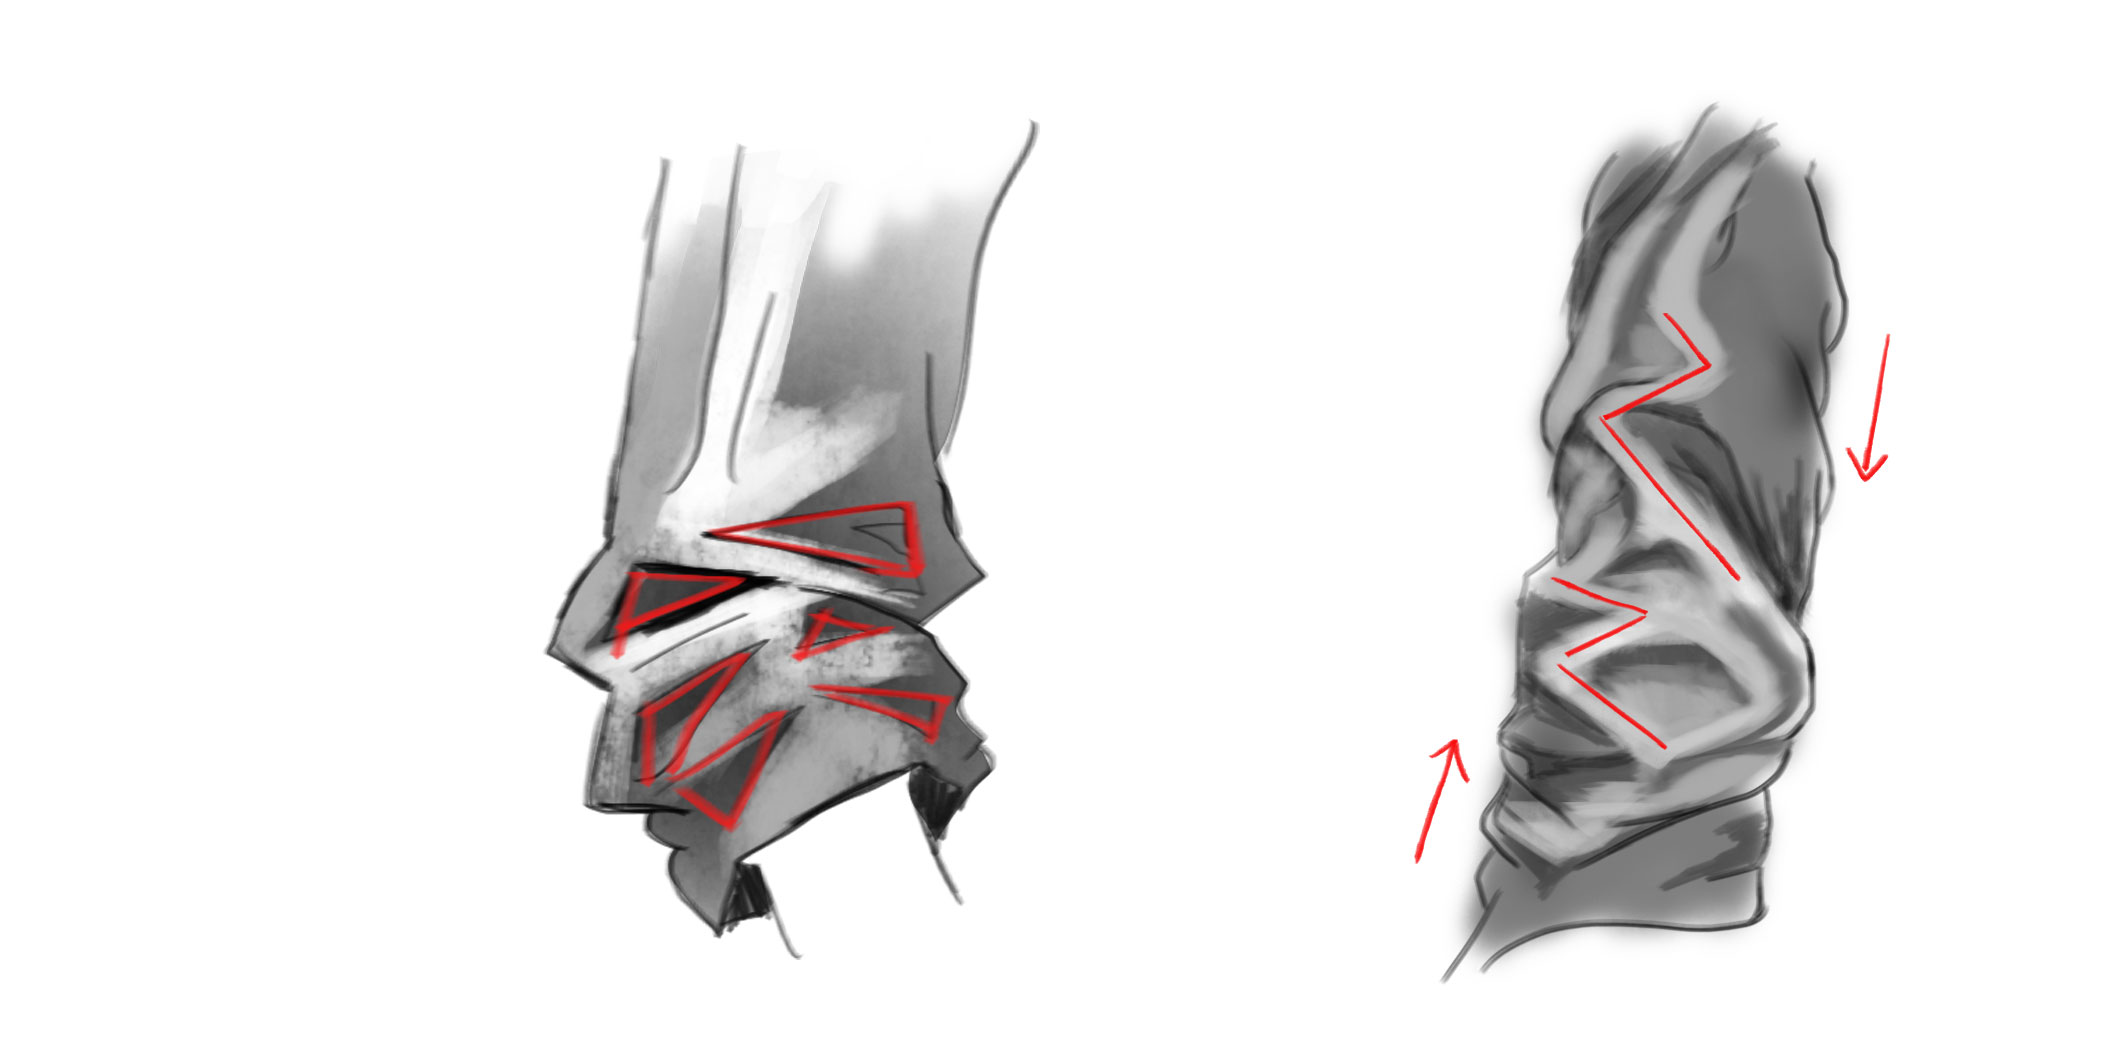
2. Zigzag (or Diamond) Folds
When they appear:
When tubular clothing—like sleeves or pant legs—gets compressed, usually from bending a joint or stacking fabric near cuffs.
What to look for:
Repeating zigzag or diamond shapes that “bunch up” the fabric. These are more angular and form naturally around bent limbs or stacked fabric.
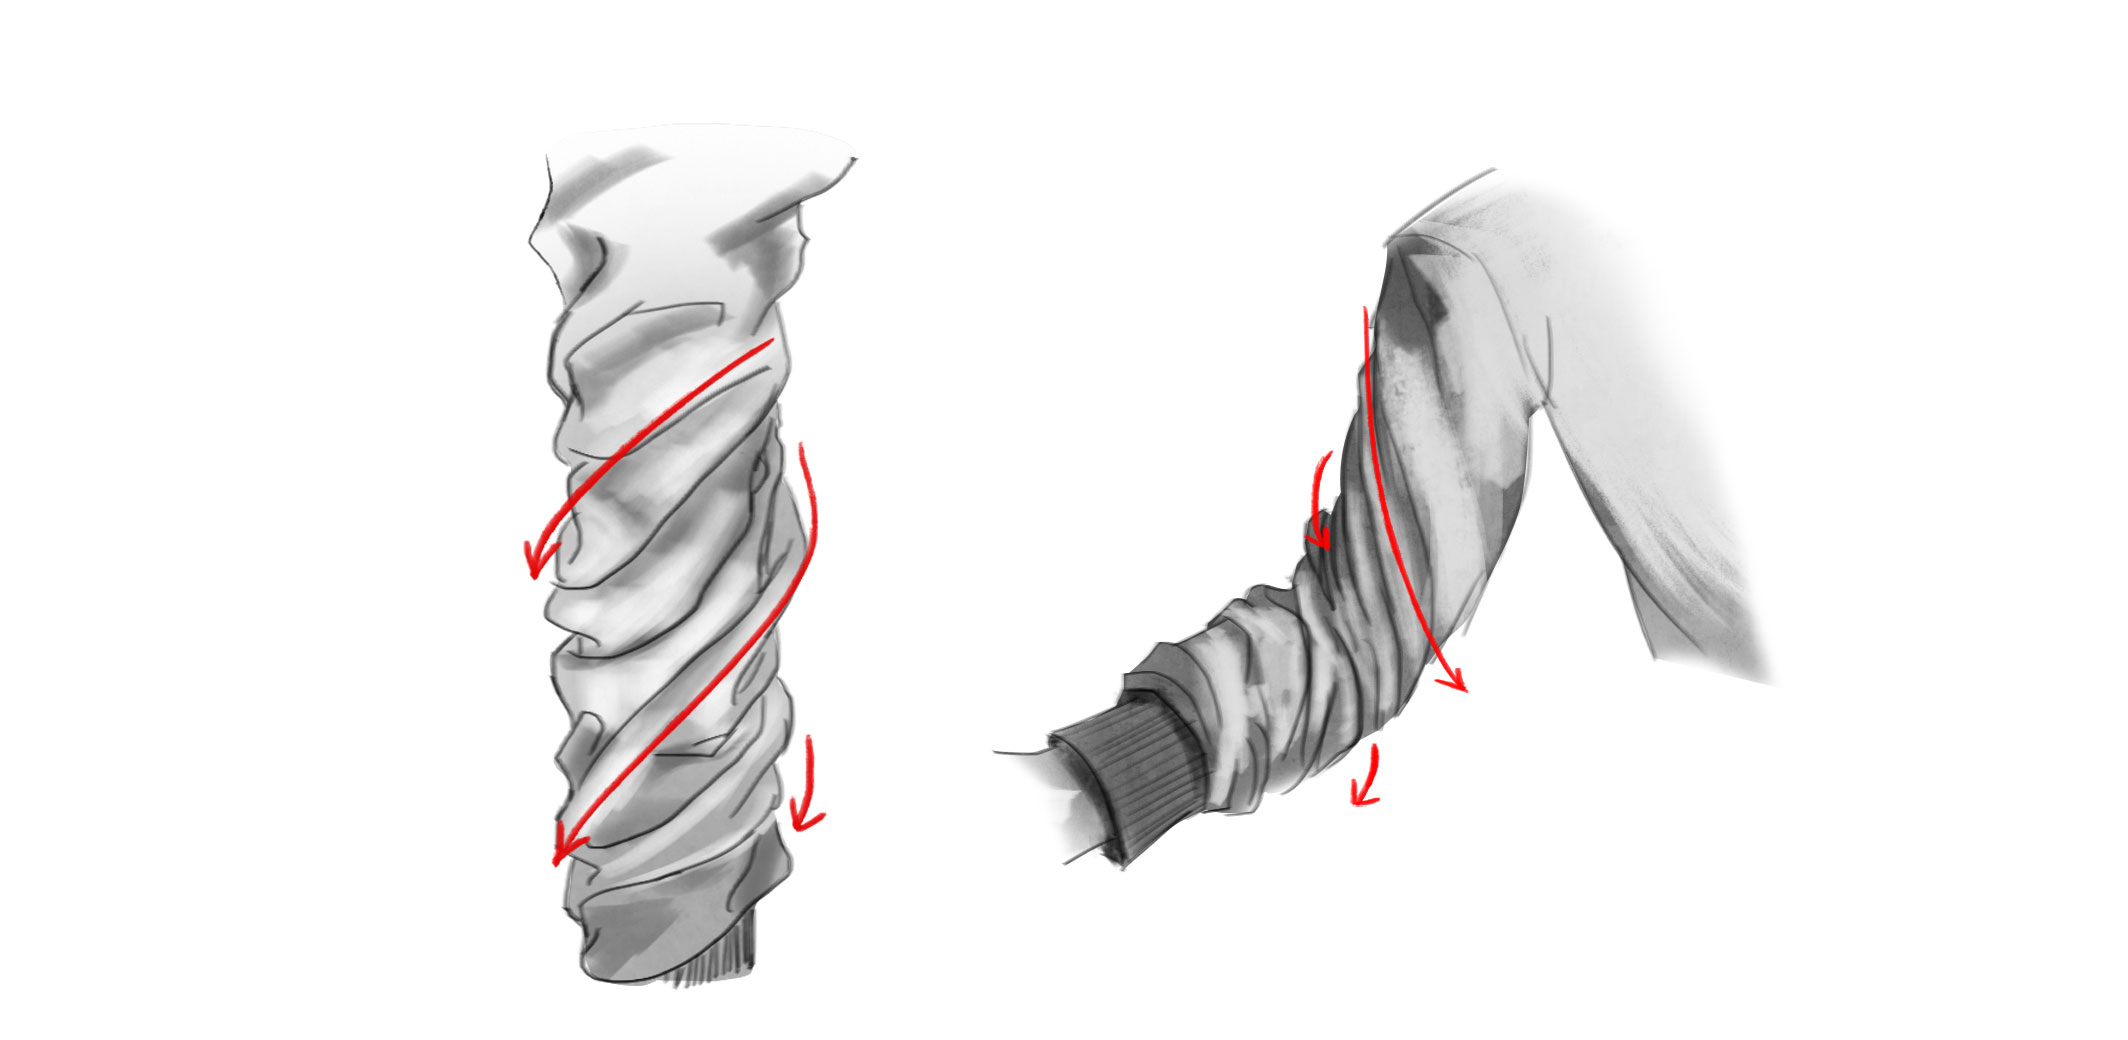
3. Spiral Folds
When they appear:
When tight fabric wraps around cylindrical parts of the body, like arms or torsos, especially when twisted.
What to look for:
A spiraling pattern caused by tension in the fabric being pulled or twisted—imagine rolled-up sleeves or a tight shirt around the torso.
Key difference from zigzag folds:
Zigzag folds form from compression. Spiral folds form from twisting tension.
4. Half-Lock Folds
When they appear:
Whenever fabric abruptly changes direction—like when arms or legs are bent.
What to look for:
Bold, angular folds where fabric compresses on one side of a joint (like the inside of a bent elbow or knee), often forming sharp, cave-like shapes.
Why they’re easy to learn:
These folds are very consistent in shape, so once you get the hang of drawing them, you’ll be able to reuse them in lots of poses.

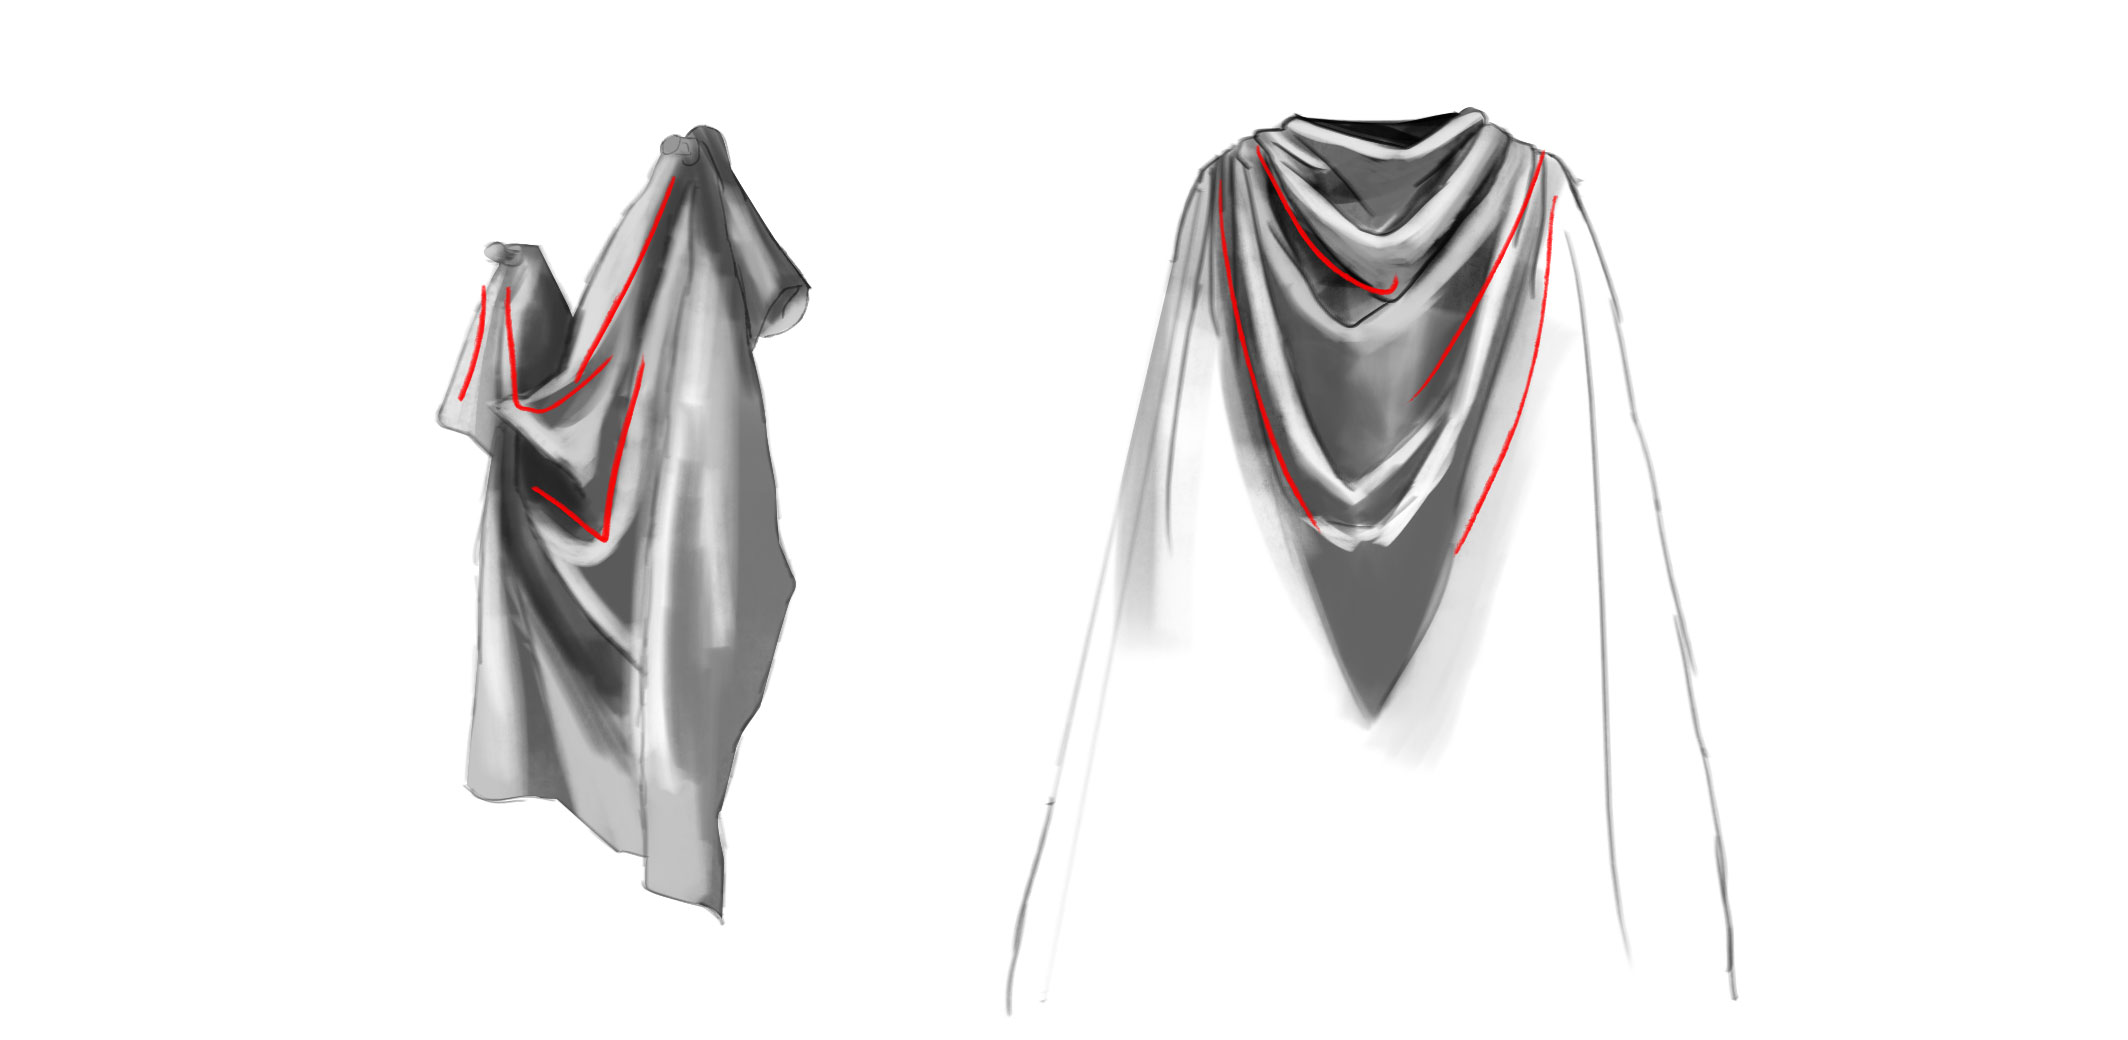
5. Diaper Folds
When they appear:
When fabric hangs between two fixed points—like the loose back of a shirt or fabric between the legs.
What to look for:
Soft, rounded arcs that sag between anchor points. They’re tighter near the tension points and widen as gravity pulls them downward.
Fun fact:
These are called “diaper folds,” from the older textile term diaper (a patterned cloth common in historical garments and linens). The folds form when fabric is suspended from two points, creating a draped, U-shaped pattern.
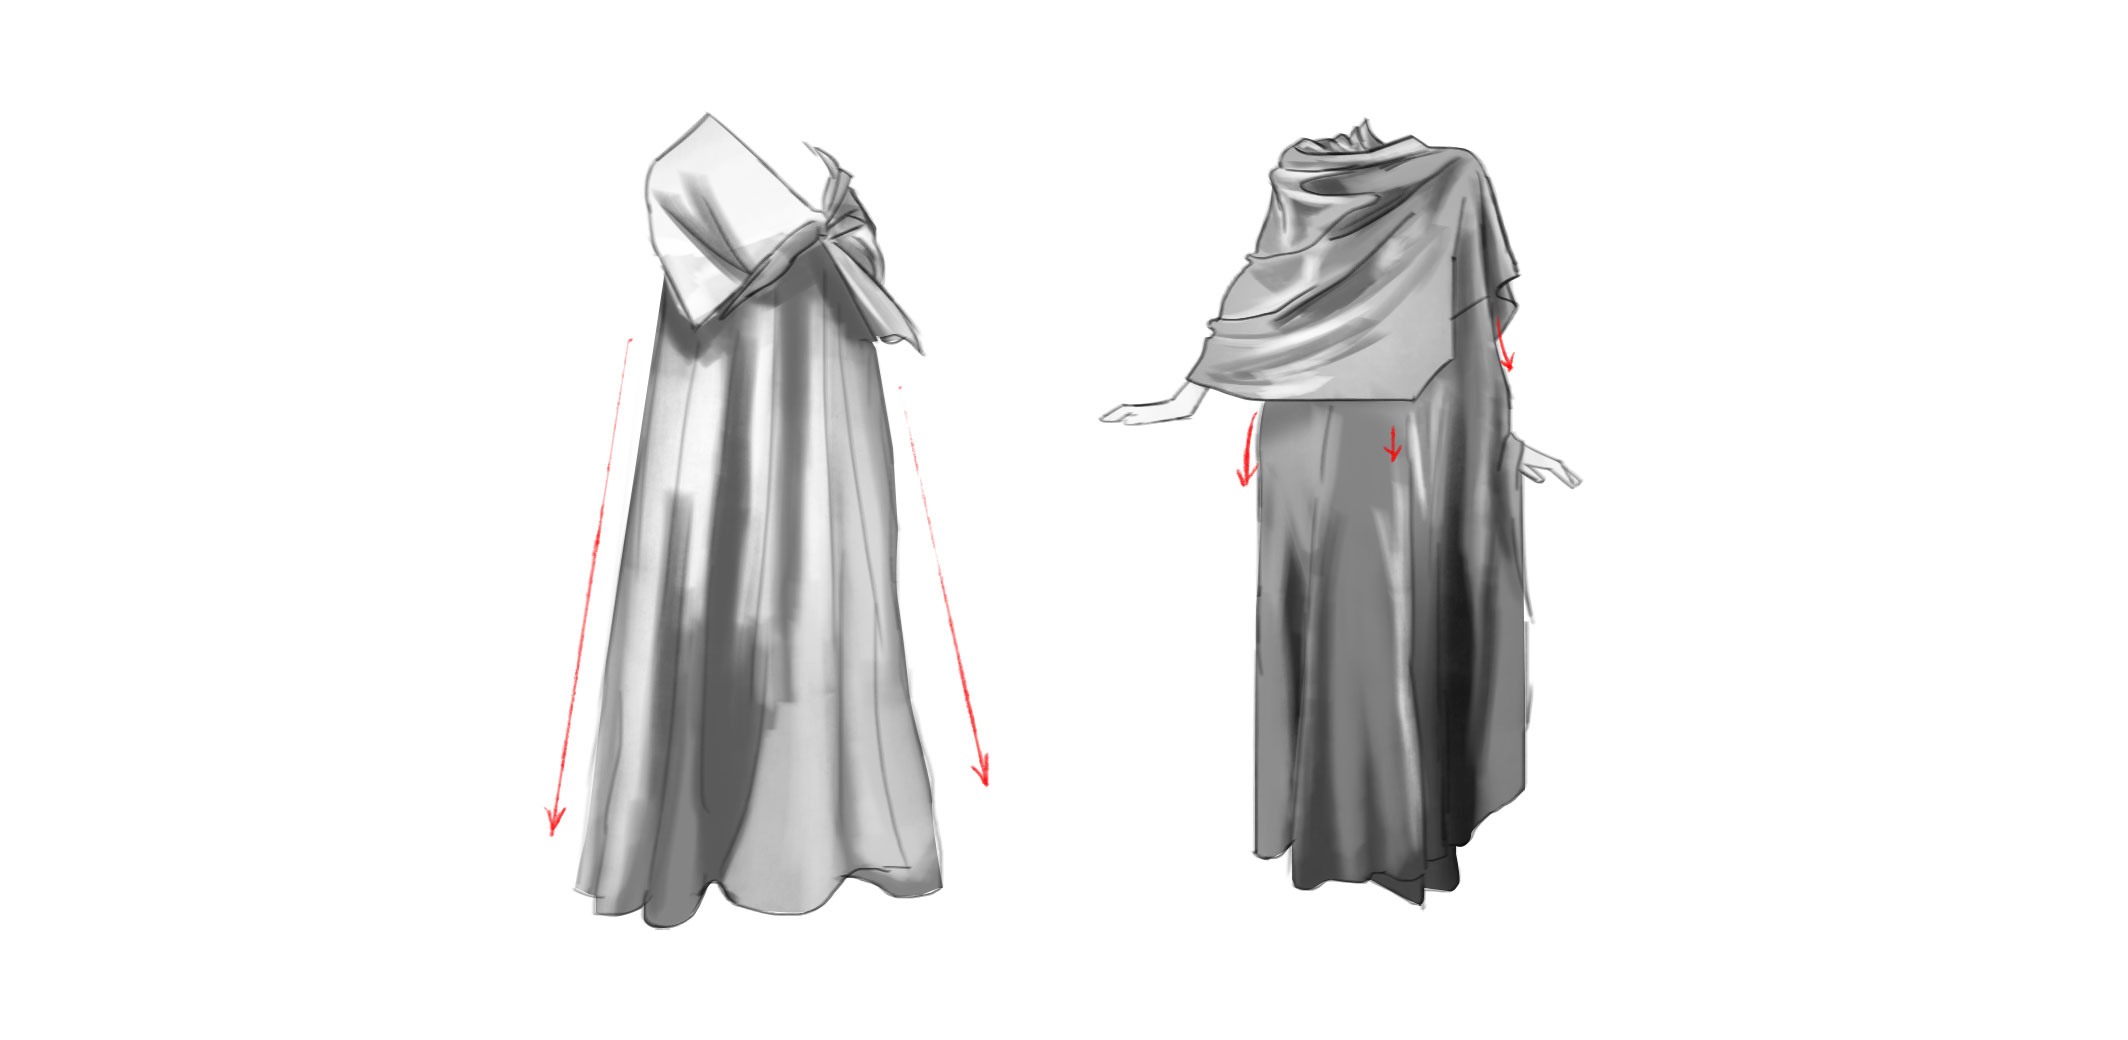
6. Drop (or Flying) Folds
When they appear:
When fabric hangs from a single point—like curtains, draped scarves, or capes.
What to look for:
Long, vertical folds that follow gravity with minimal interruption. They’re smooth and flowy, pulled only by their own weight.
Examples:
Curtains hanging from a rod, or a cape draping off shoulders.
Bonus: Inert Folds
When they appear:
When fabric is lying flat or crumpled on a surface—like a towel on the floor.
What to look for:
Pure chaos. No predictable pattern, no consistent structure. These folds are difficult to draw and always need references.
Tip:
Don’t try to invent these. Grab a reference photo and draw what you see.
More to know:
- Inert folds also show the shape of whatever’s under them. If you drape cloth over stairs, the folds will change if you move the fabric, but they’ll always hint at the staircase underneath.
- People sometimes call them “dead folds,” but “inactive folds” fits better.
- Inert folds can include other fold types mixed in, but the whole pile is still considered inert.
- Even though the pile isn’t moving, you can use it to suggest movement that already happened. For example: extra fabric in a dress or cloak can settle into inert folds that show which way a character just walked.
- The folds inside the pile change every time you move the fabric — but the overall pile still feels heavy and unmoving.
Why These Folds Matter
You don’t need to memorize every single wrinkle in fabric—just six main types (plus inert folds for rare cases). Once you understand where the tension is and how gravity pulls on the fabric, you’ll be able to draw clothing from imagination that actually looks like real cloth.
Use this cheat sheet:
- Pipe folds = radiating from tension points
- Zigzag folds = compressed tubes
- Spiral folds = twisted around cylinders
- Half-lock folds = compressed corners at joints
- Diaper folds = fabric hanging between two anchors
- Drop folds = fabric hanging from a single point
If you’re just starting out, you might also like my beginner’s guide: How to Start Digital Art.
And if you want to level up further, check out this tutorial on materials: How to Paint Realistic Metal.
Final Tip
Memorizing folds might seem overwhelming, but you only need to learn the six patterns above. From there, it’s just observation, practice, and repetition.
Happy sketching—and go fold like a boss.
Discover More Posts
Keep exploring stories, insights, and creative notes from my journey as an artist. Check out the latest blog entries and find topics that inspire your own process.

How to Draw Stunning Anime Clouds
Learn to draw anime-style clouds with this easy, step-by-step cloud tutorial. You’ll pick up tips on shapes, color, and composition—plus get free cloud brushes to use in your own art.
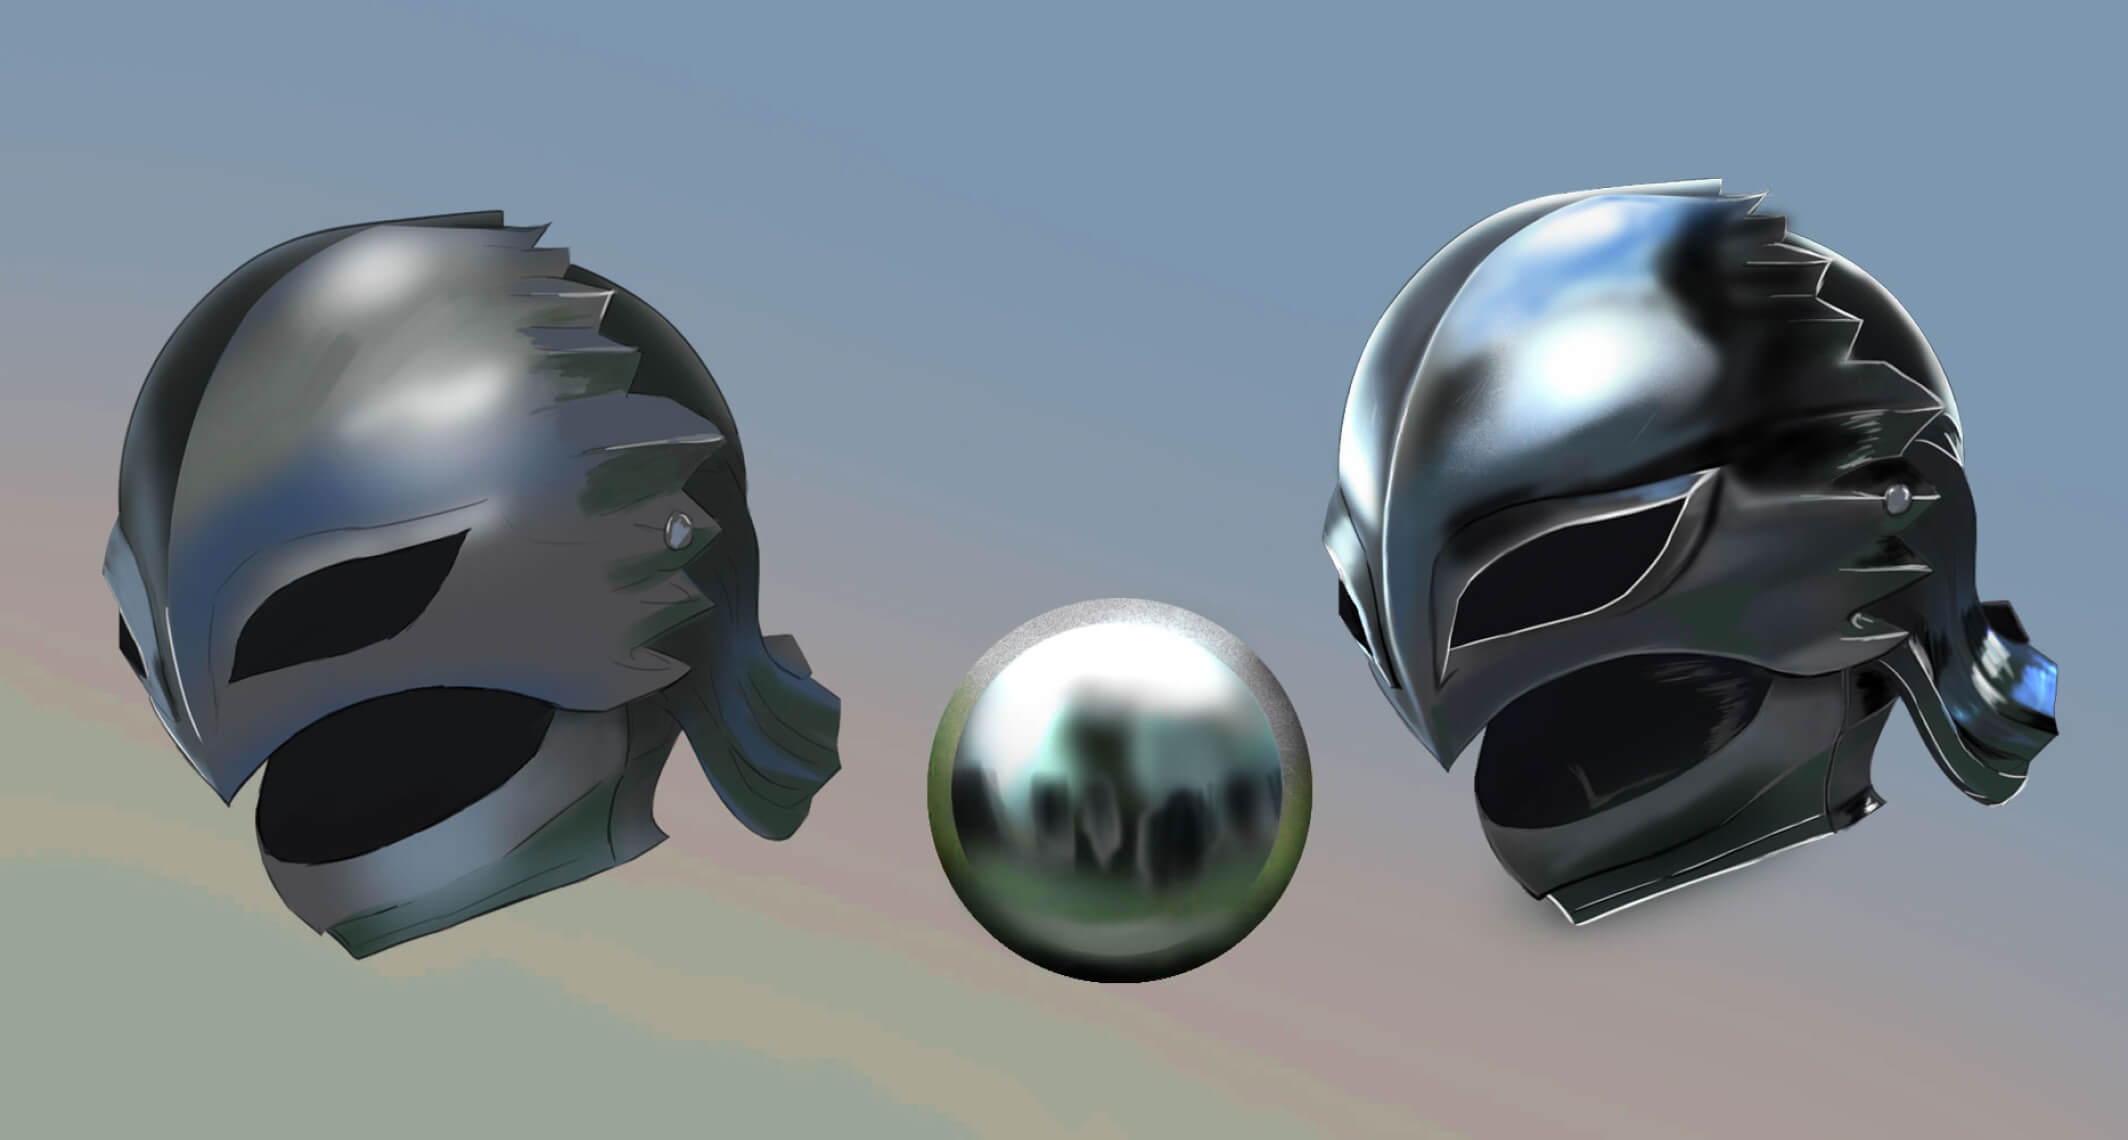
How to Paint Realistic Metal
Learn how to paint realistic metal with this step-by-step guide. From base colors to to lighting and reflections, get practical tips for your artwork shine, literally.

Color Theory Made Simple: A guide for Beginner Artist
New to Digital painting? This beginner-friendly guide breaks down hue, value, saturation, color harmonies, and practical tips to help you choose better palettes and level up your art.